Why so quiet?
Just a quick update to share that I’ve not posted in oh, like, a decade because I’ve moved to Seattle, started a family, and focused on improving the consumer home buying experience! Please check out what I’ve been working on at Tomo.com for home listings and HelloTomo.com for mortgages.
Looseleaf Chai Tea

I think the best recipes are ones that don’t require strict measurement, where the taste is a bit different each time and that difference is part of the pleasure. That probably holds most true for my recipe for looseleaf chai tea. We go through this tea quickly, and as a result we make it frequently, savoring the slight variation from week to week.
This tea is a great alternative to coffee and drink it in the mornings and sometimes again later in the day. It is caffeinated, as the base is black. But of course black tea is not as heavily caffeinated as coffee, and mixing it with spices reduces the load per cup even further. To make your first batch, start by blending together the following ingredients:
- 1 1/4 cups looseleaf assam tea
- 3 tablespoons cinnamon chips (if you can’t find chips, soak cinnamon sticks in water for a few minutes and then tear them into bits)
- 10 star anise, broken into individual lobes
- 1 teaspoon fennel seeds
- 1 teaspoon dried minced ginger
- 2 tablespoons cloves
- 1/2 teaspoon cardamom
- 1 teaspoon black peppercorns
- 1 teaspoon white peppercorns
You can — and should — modify these proportions to taste! The measurements certainly don’t have to be precise; I usually use my hands instead of teaspoons and go by the look of the mix more than anything. Happily, if you find you are running short on one ingredient, you can in some cases do a bit of substitution. For example, both the cloves and the cardamom are sweet and spicy at the same time; if you don’t have enough of one, amp up the other. The same goes for the anise and the fennel seed; chopped dried licorice root can also be used in a pinch, although it is sweeter.
To blend, just put the ingredients together in some sort of tin and shake to combine. No, the blending will never be perfect. In theory one cup could be a bit more gingery or peppery than another; in practice, though, I can’t say that I’ve had this problem. I do recommend against using a glass jar to store your tea, since tea leaves degrades with light. Once you have prepared your blend, you can draw on it to make yourself cup after cup:
- Position a tea strainer in a mug
- Scoop in 1-2 tablespoons of the chai blend
- Add boiling water
- Let steep for 3-4 minutes (longer steeping equals stronger taste but also higher caffeine levels)
- Stir in honey and then add a splash of milk
My go-to tea strainer is the same standard gold-mesh affair that you can find nearly everywhere. If you’re making your tea to go, however, this travel mug with a built-in strainer from T2 Tea is unbeatable. I know that sourcing these ingredients might be challenging, so a few notes on where to acquire:
- MarketSpice. You can get all of these ingredients from MarketSpice, a fantastic and spice store in the historic Pike Place Market in Seattle. Buying online is easy at www.marketspice.com.
- Indian grocery stores. I’ve found good prices on anise, cardomom, and fennel at an Indian grocery store here in Cambridge called Shalimar.
- Natural food stores. Our local coop – Harvest, also in Cambridge – stocks most of these ingredients. Whole Foods stocks a few, but at prices so high that you can’t really buy them in the quantities you need.
Of course, there are lots of other sources for tea and for spices. This list is by no means exhaustive.


Ketchup (And Fries, Of Course)

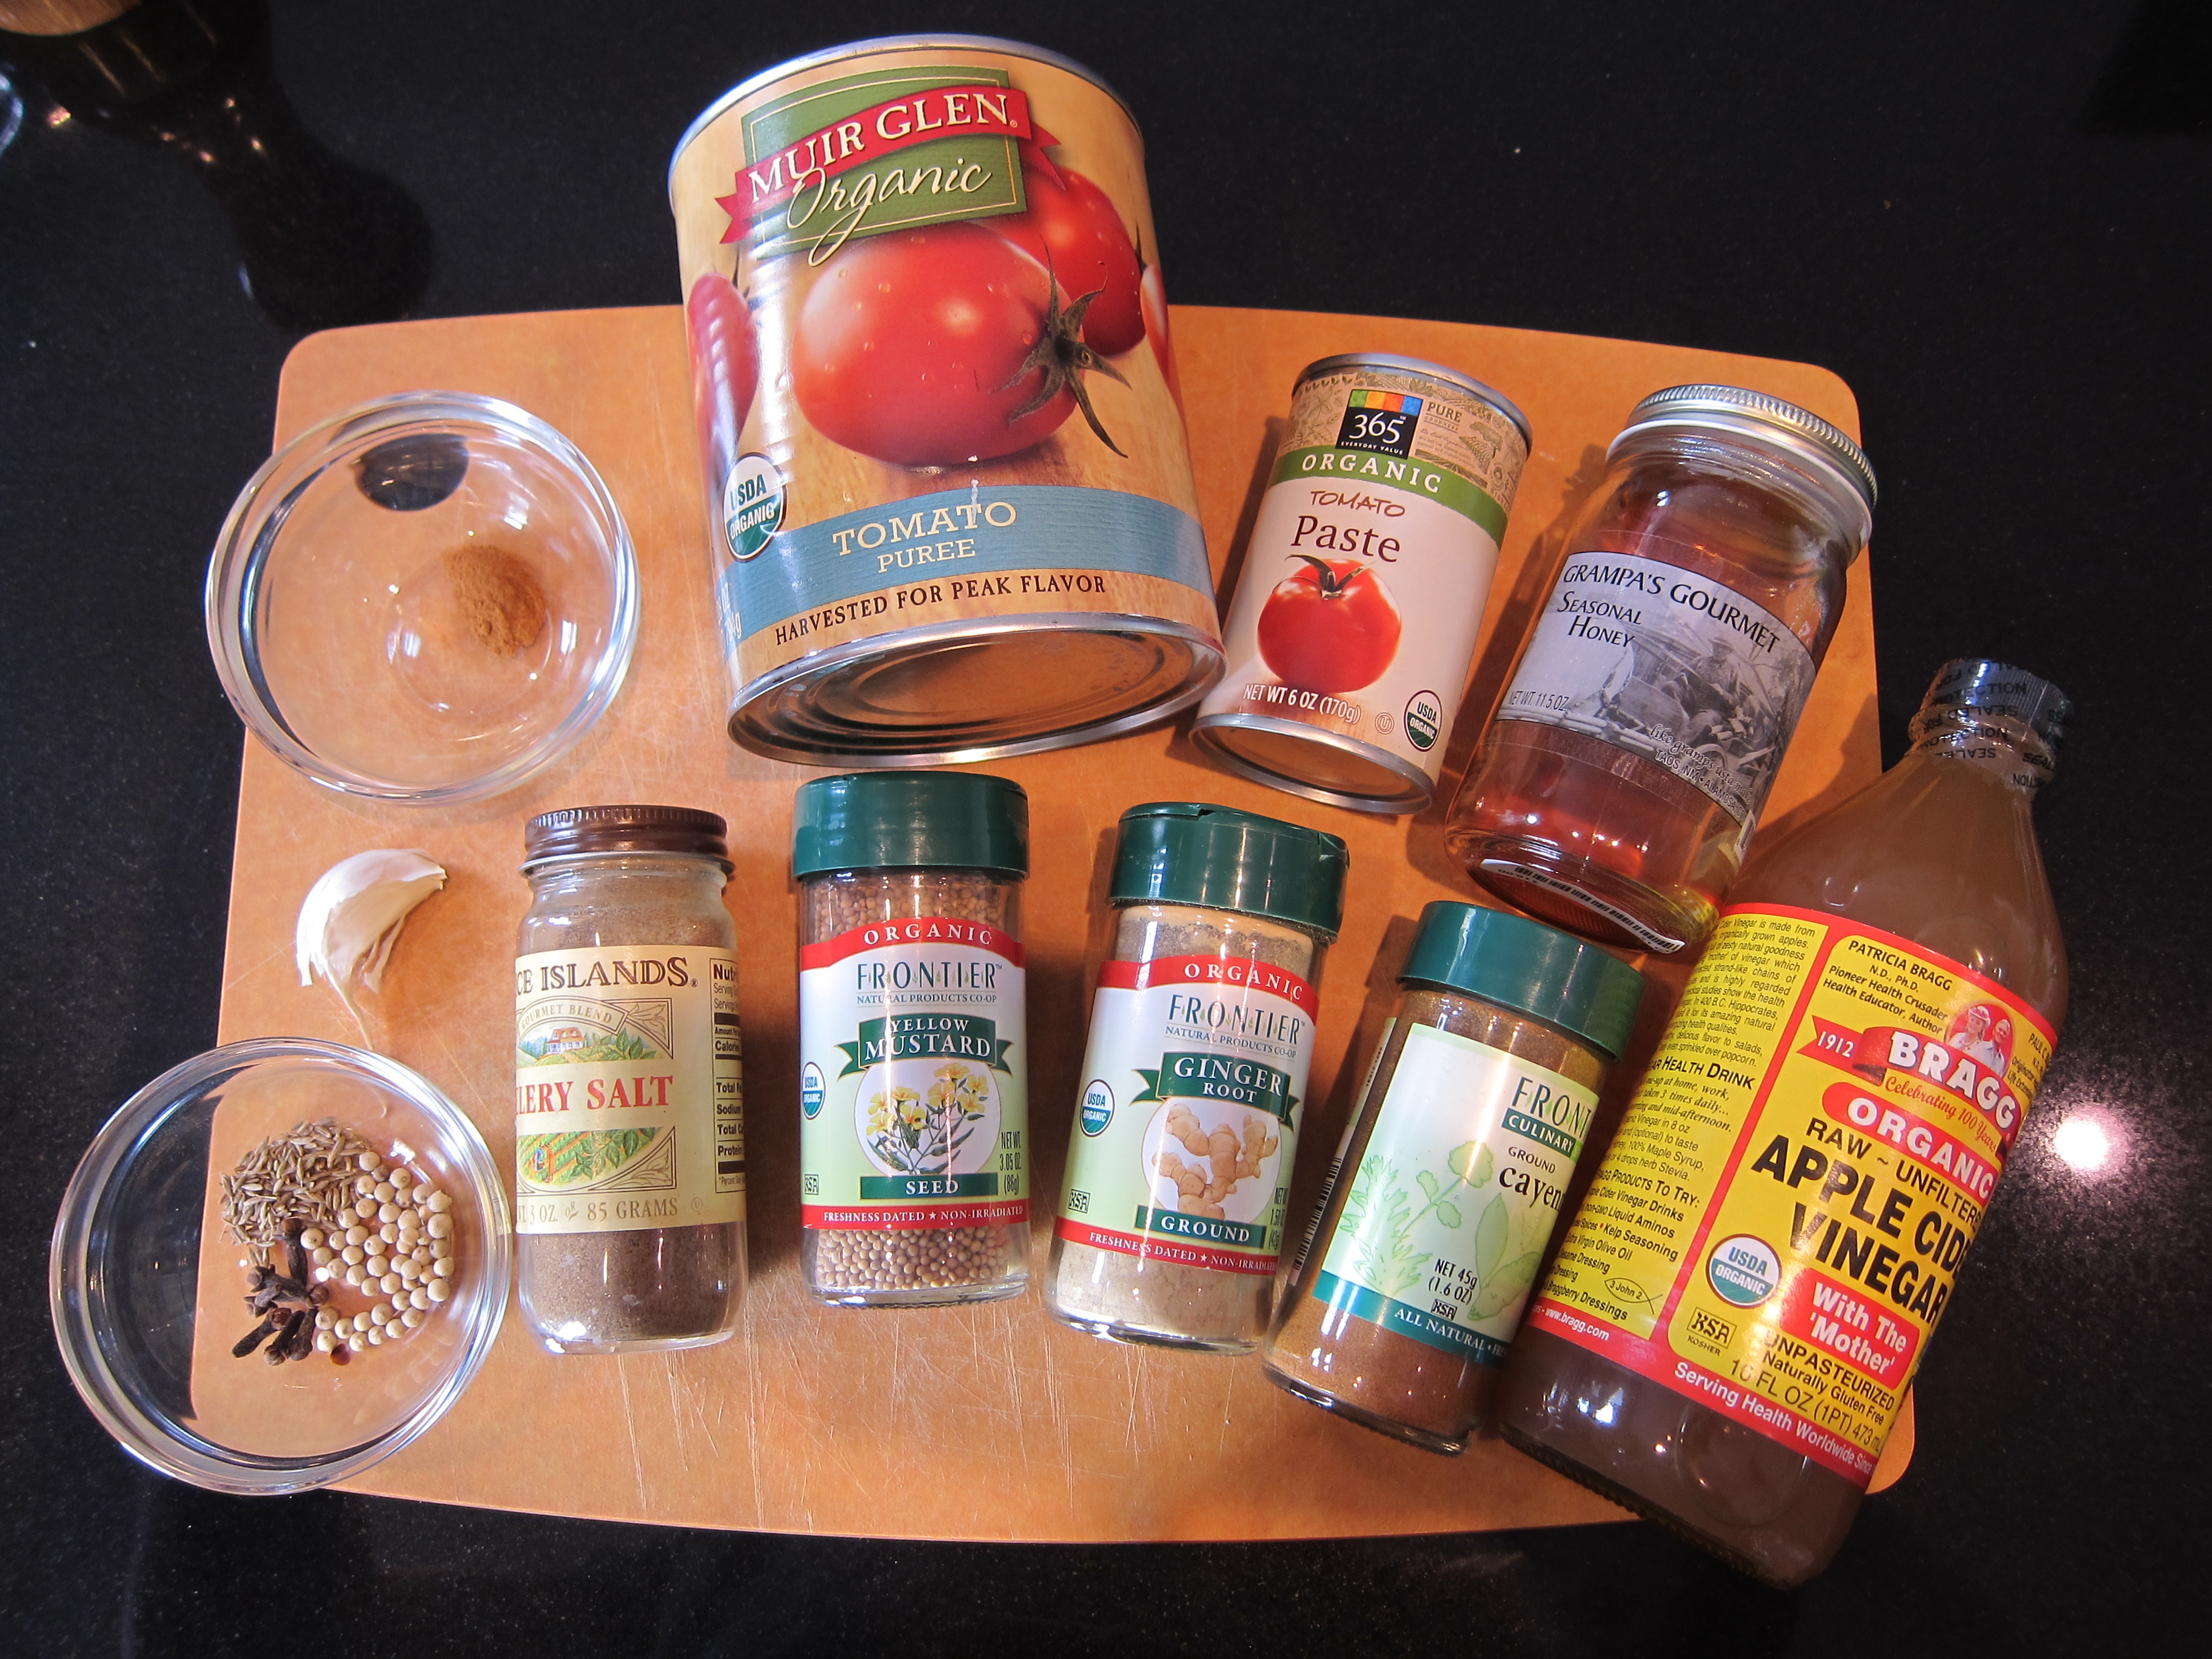
I miss tomato season! It looks like my stash of canned salsa will last through the winter, but I never did get around to making ketchup. This was a big disappointment, as I didn’t think I’d ever tried real ketchup and was eager to get a taste. I couldn’t wait until summer, so I developed a ketchup recipe with canned tomatoes for now. Come summer I’ll refresh it for fresh, whole tomatoes and expect to achieve even better results. Yes, there are tomatoes for sale in Boston through the winter, but they are nowhere near as good as canned tomatoes, which are picked and preserved during the harvest.
To achieve a very tomatoey-tasting ketchup that has an interesting but not aggressive flavor profile, I used:
- 2 tbsp olive oil
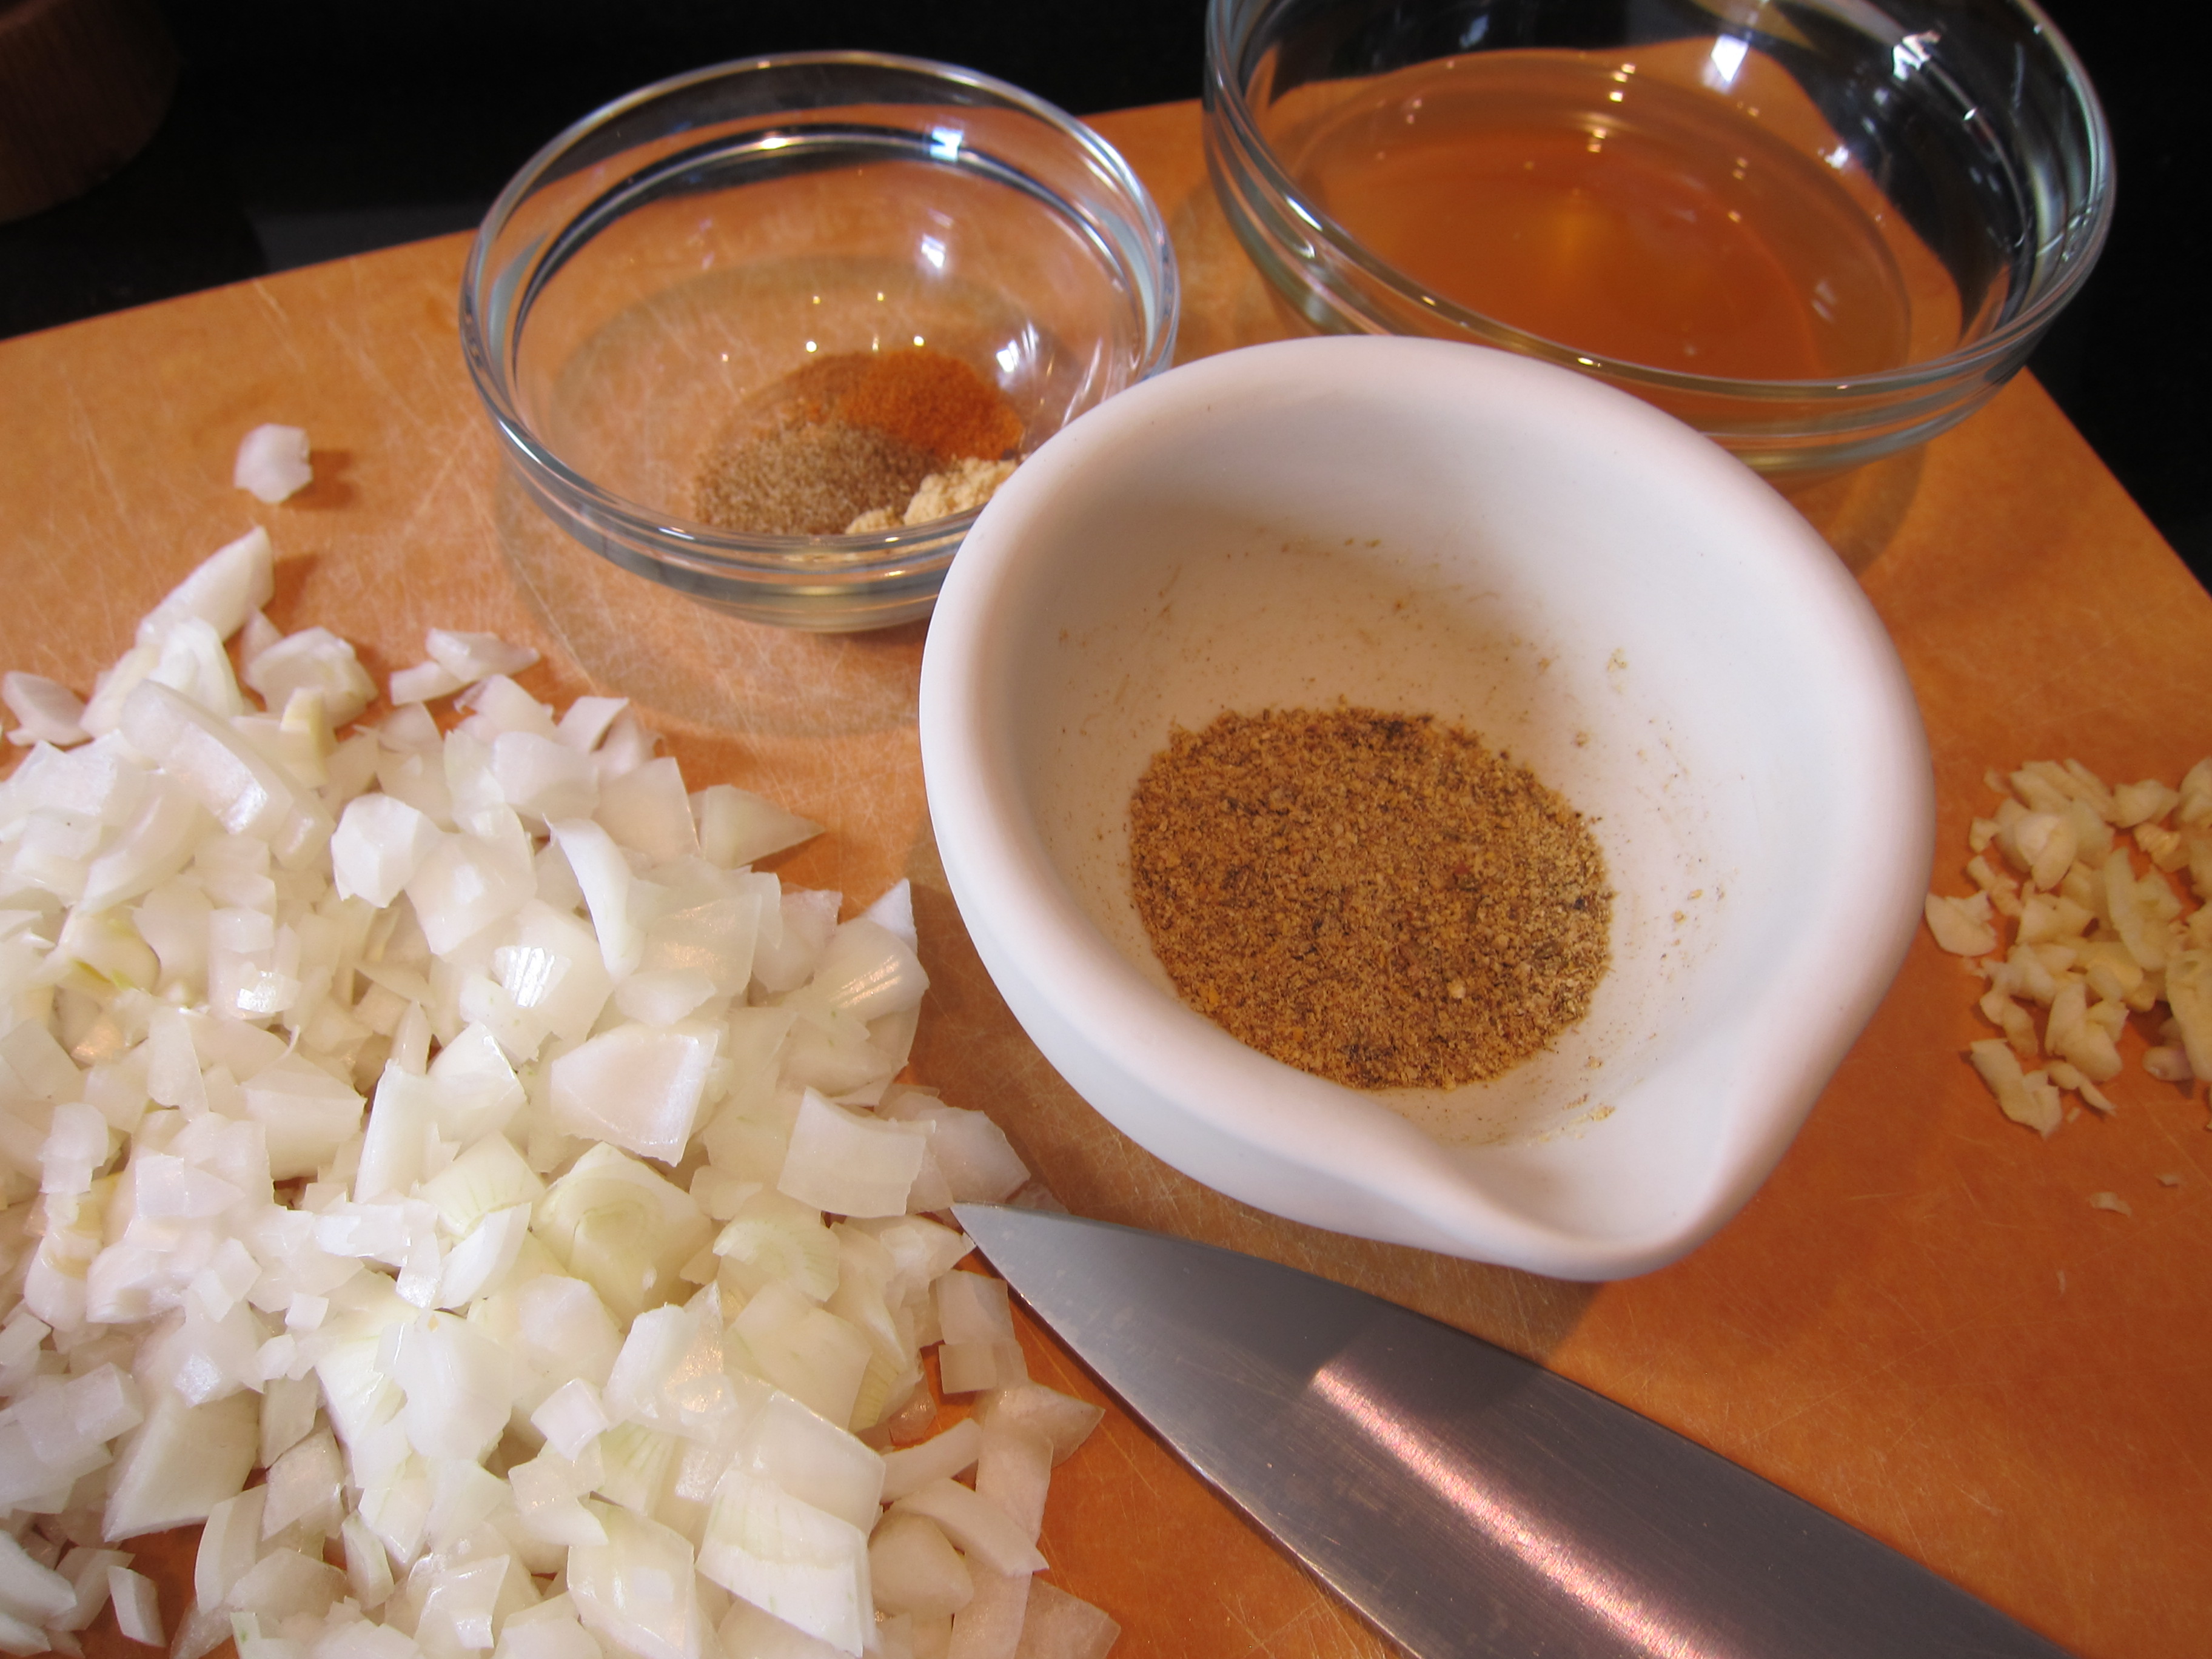
- 1 medium onion, diced
- 1 clove garlic, minced
- 2 tbsp honey
- 1/4 cup cider vinegar
- 1/4 tsp salt
- 1/4 tsp celery salt
- 1/4 tsp ground ginger
- 1/4 tsp ground mustard seeds
- 1/8 tsp ground pepper
- 1/8 tsp ground cloves
- 1/8 tsp ground cinammon
- 1/8 to 1/4 tsp ground cayenne pepper, depending on your heat tolerance
- 1 28 oz can tomato puree
- 1 tbsp tomato paste
The work to turn these ingredients into ketchup was no sweat at all. In fact, it’s not so terribly different from making normal tomato sauce. Here’s how I went about it:
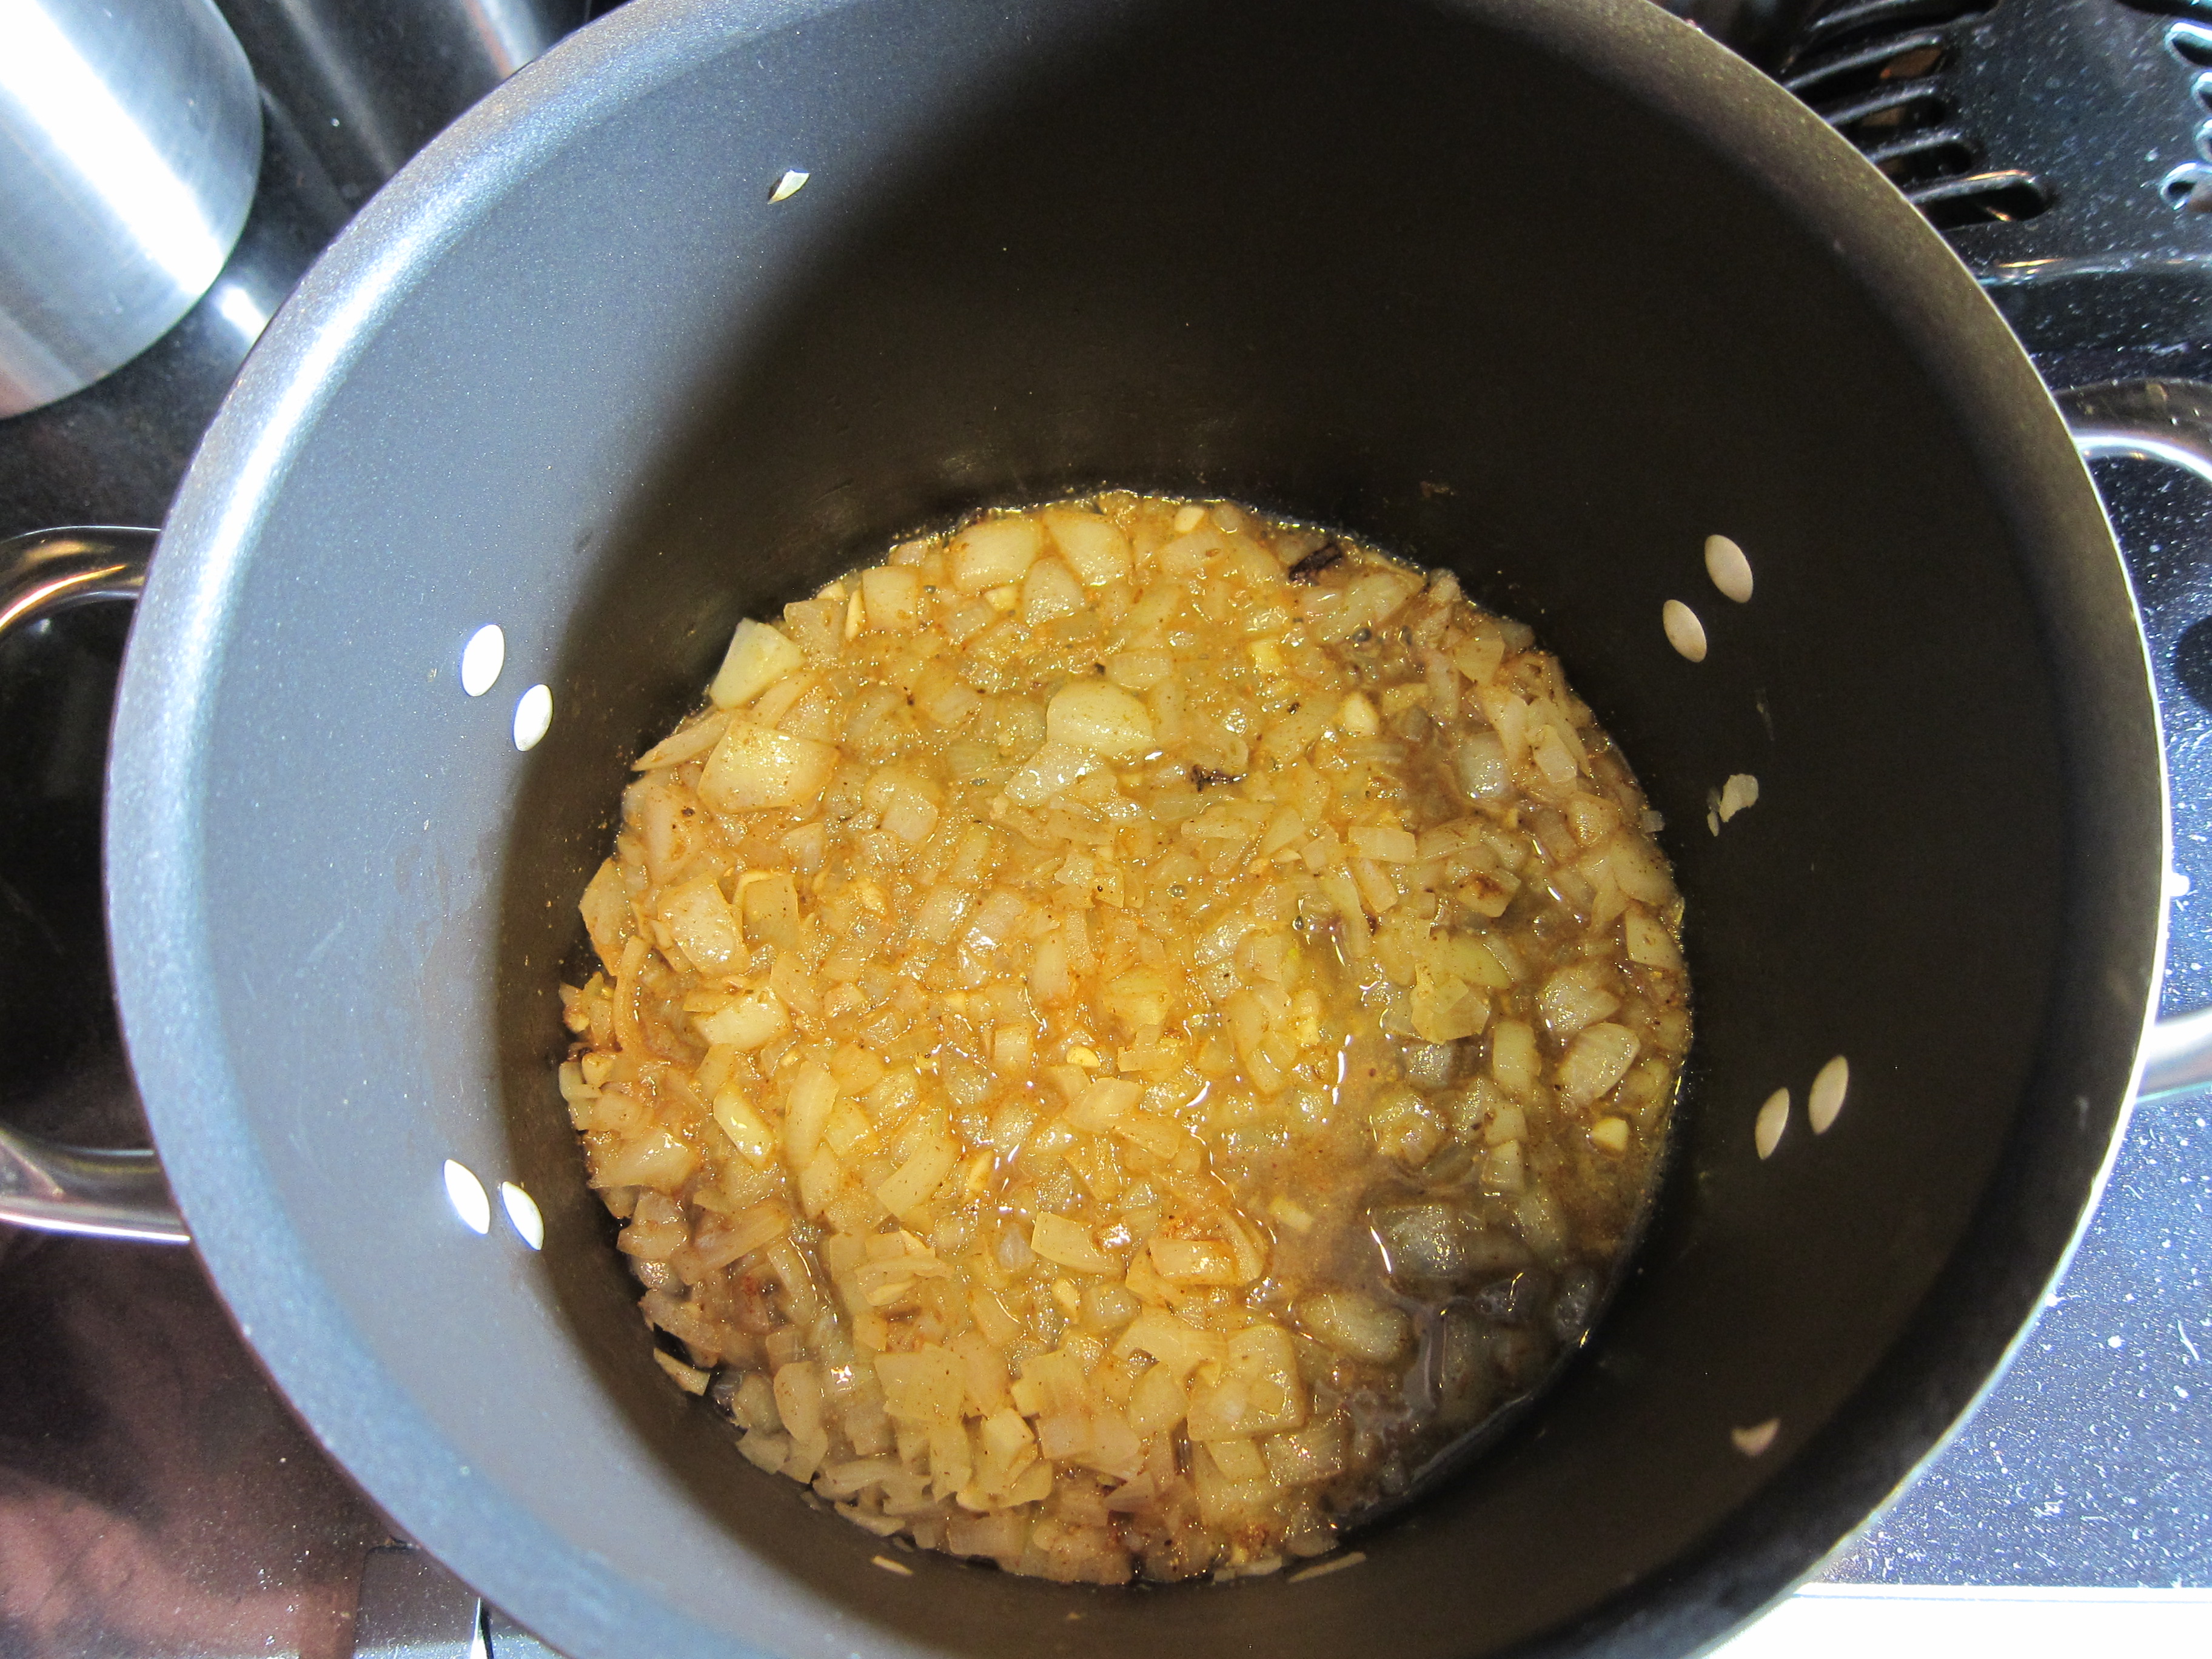
- Heat oil in large pot until it hisses when you flick a drop of water on it.
- Sautee onion until translucent, then add garlic and sautee for another 30 seconds.
- Add all other ingredients EXCEPT tomatoe puree and tomato paste; whisk well and cook for another 1 minute.
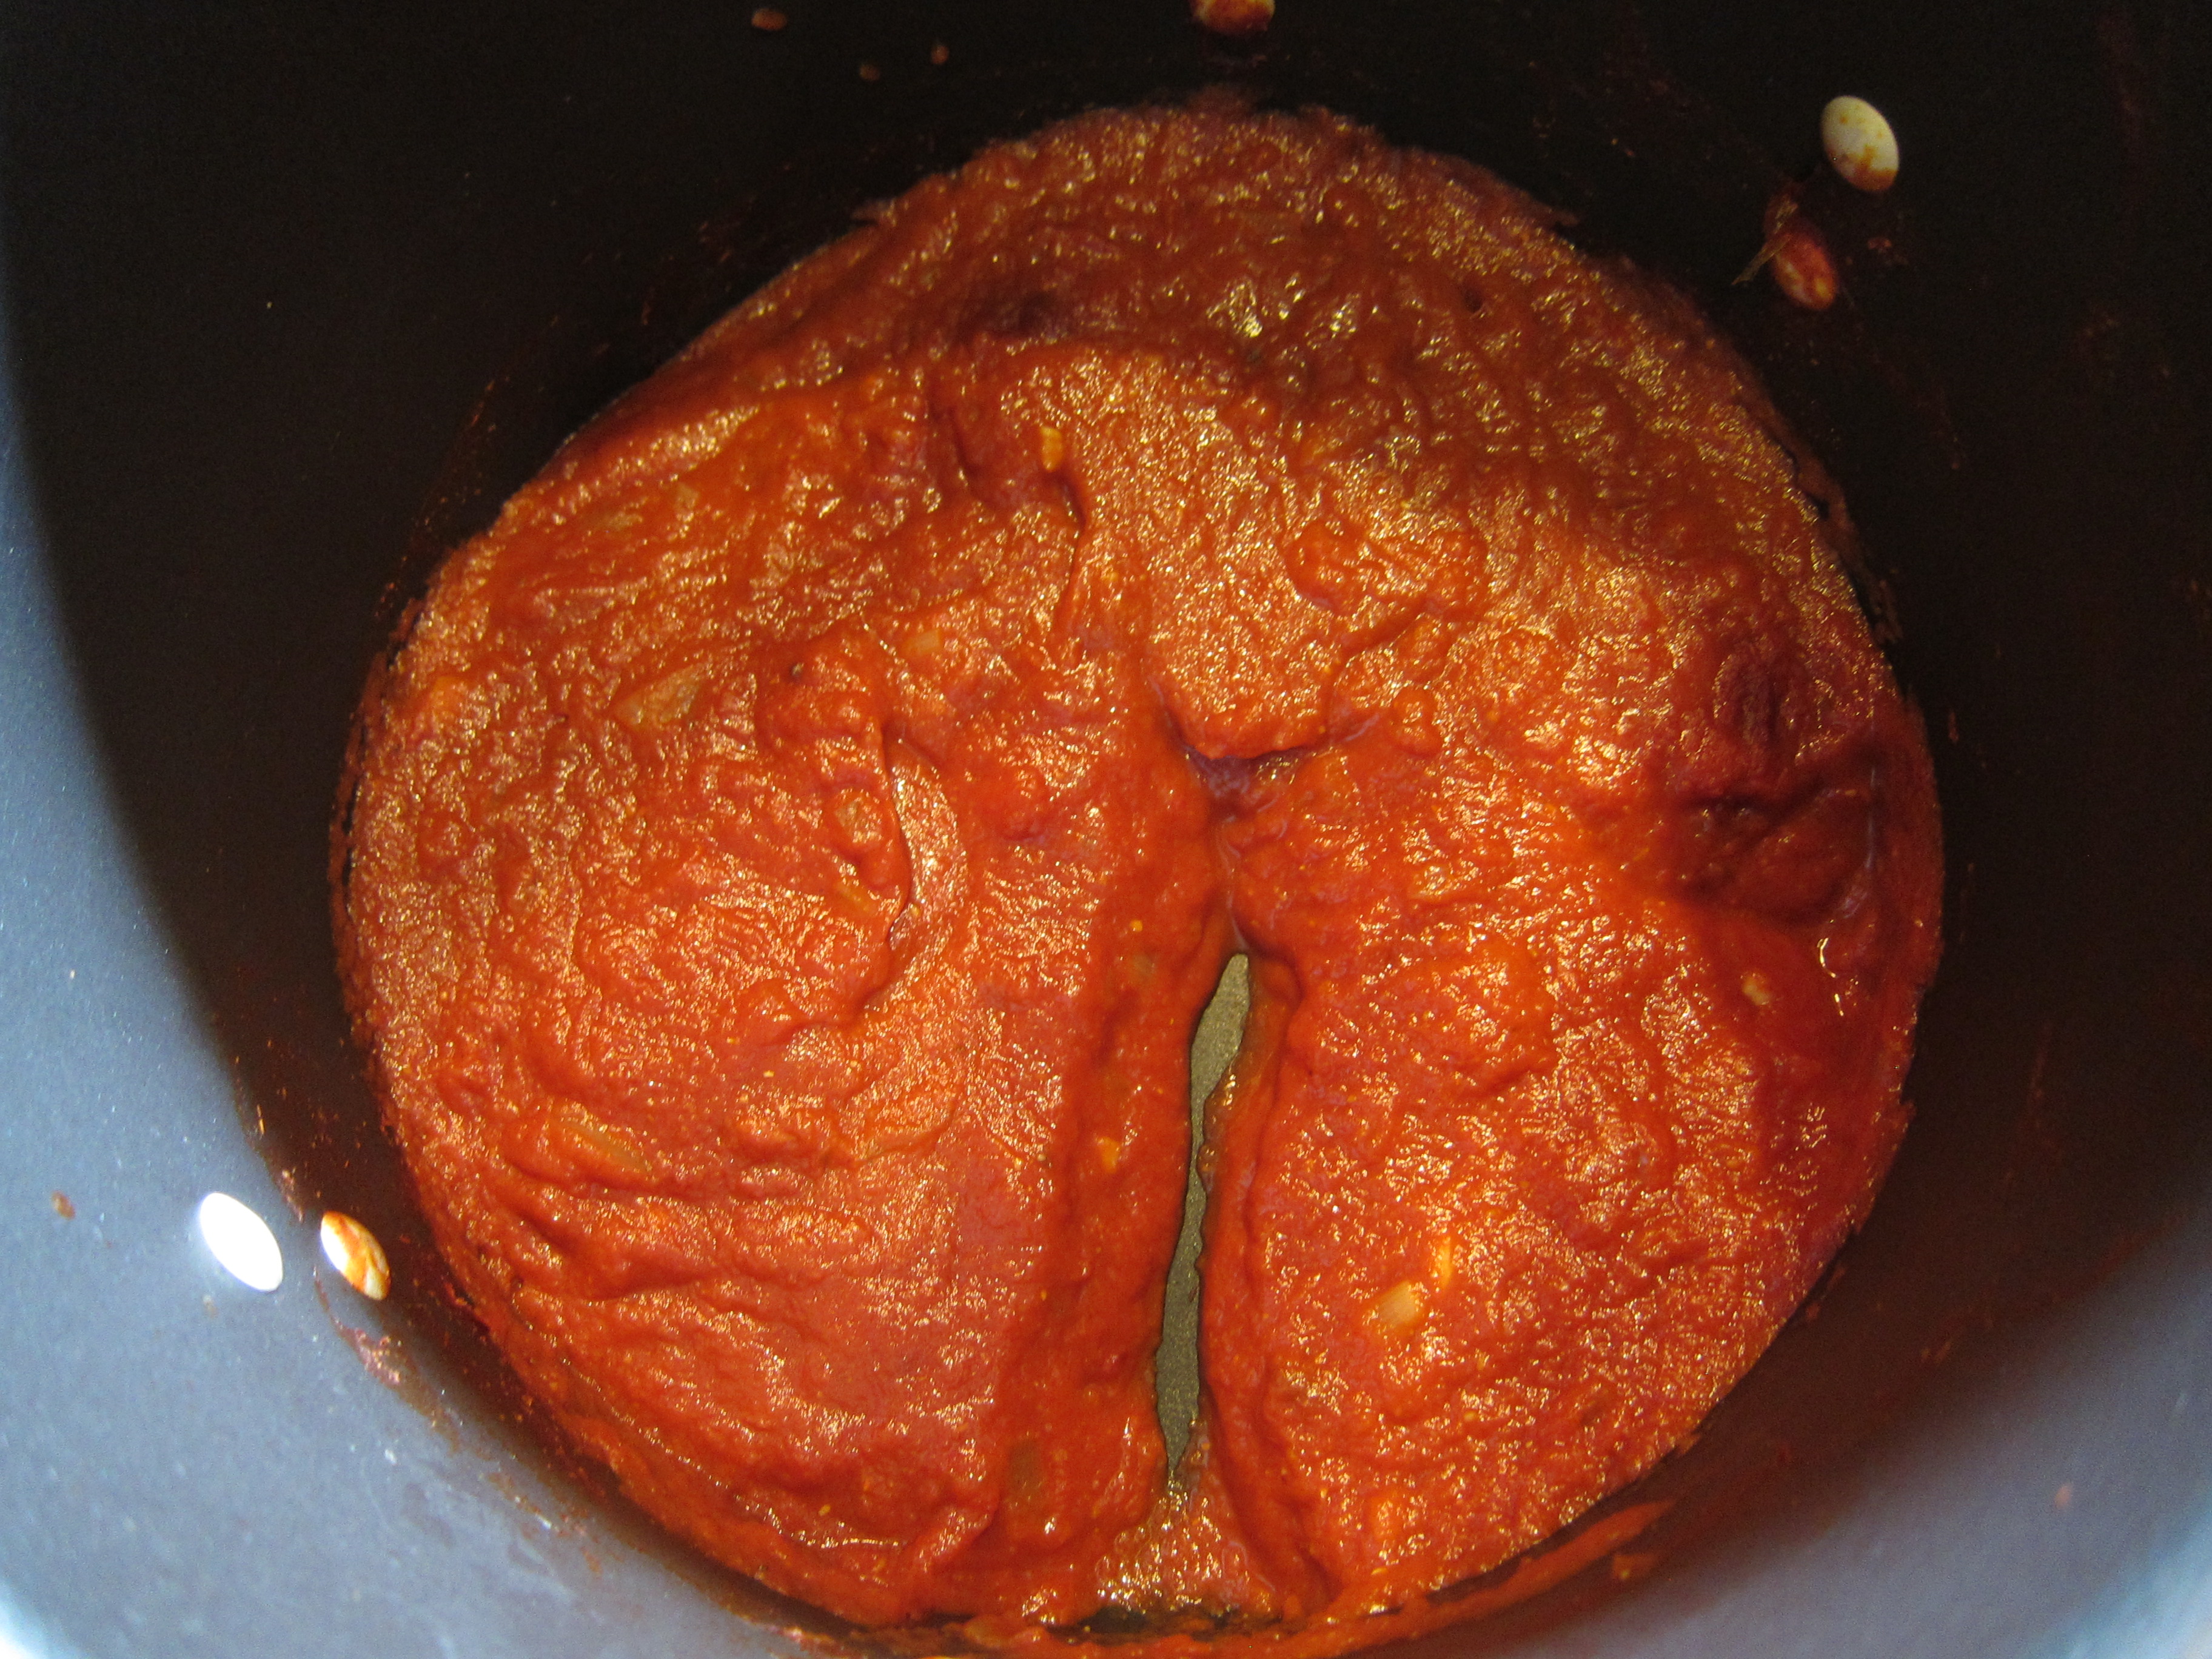
- Add tomato puree and tomato paste, whisk well, bring to a boil, lower heat to simmer, and let cook for 45 minutes. You will know the ketchup is done when you can drag a spatula through it and leave a trench in your wake that the ketchup does not immediately rush in to fill.
- Immersion blend until all lumps have disappeared. This is important, as it can be a bit disconcerting to find an onion dice in your ketchup if you are used to the commercially manufactured stuff. If the ketchup is too thick, slowly add water and continue blending until you have achieved desired consistency.
- Fill mason jars with ketchup, leaving 1/2 inch headroom. Use proper canning procedure to store at room temperature for months; otherwise, store in refrigerator.
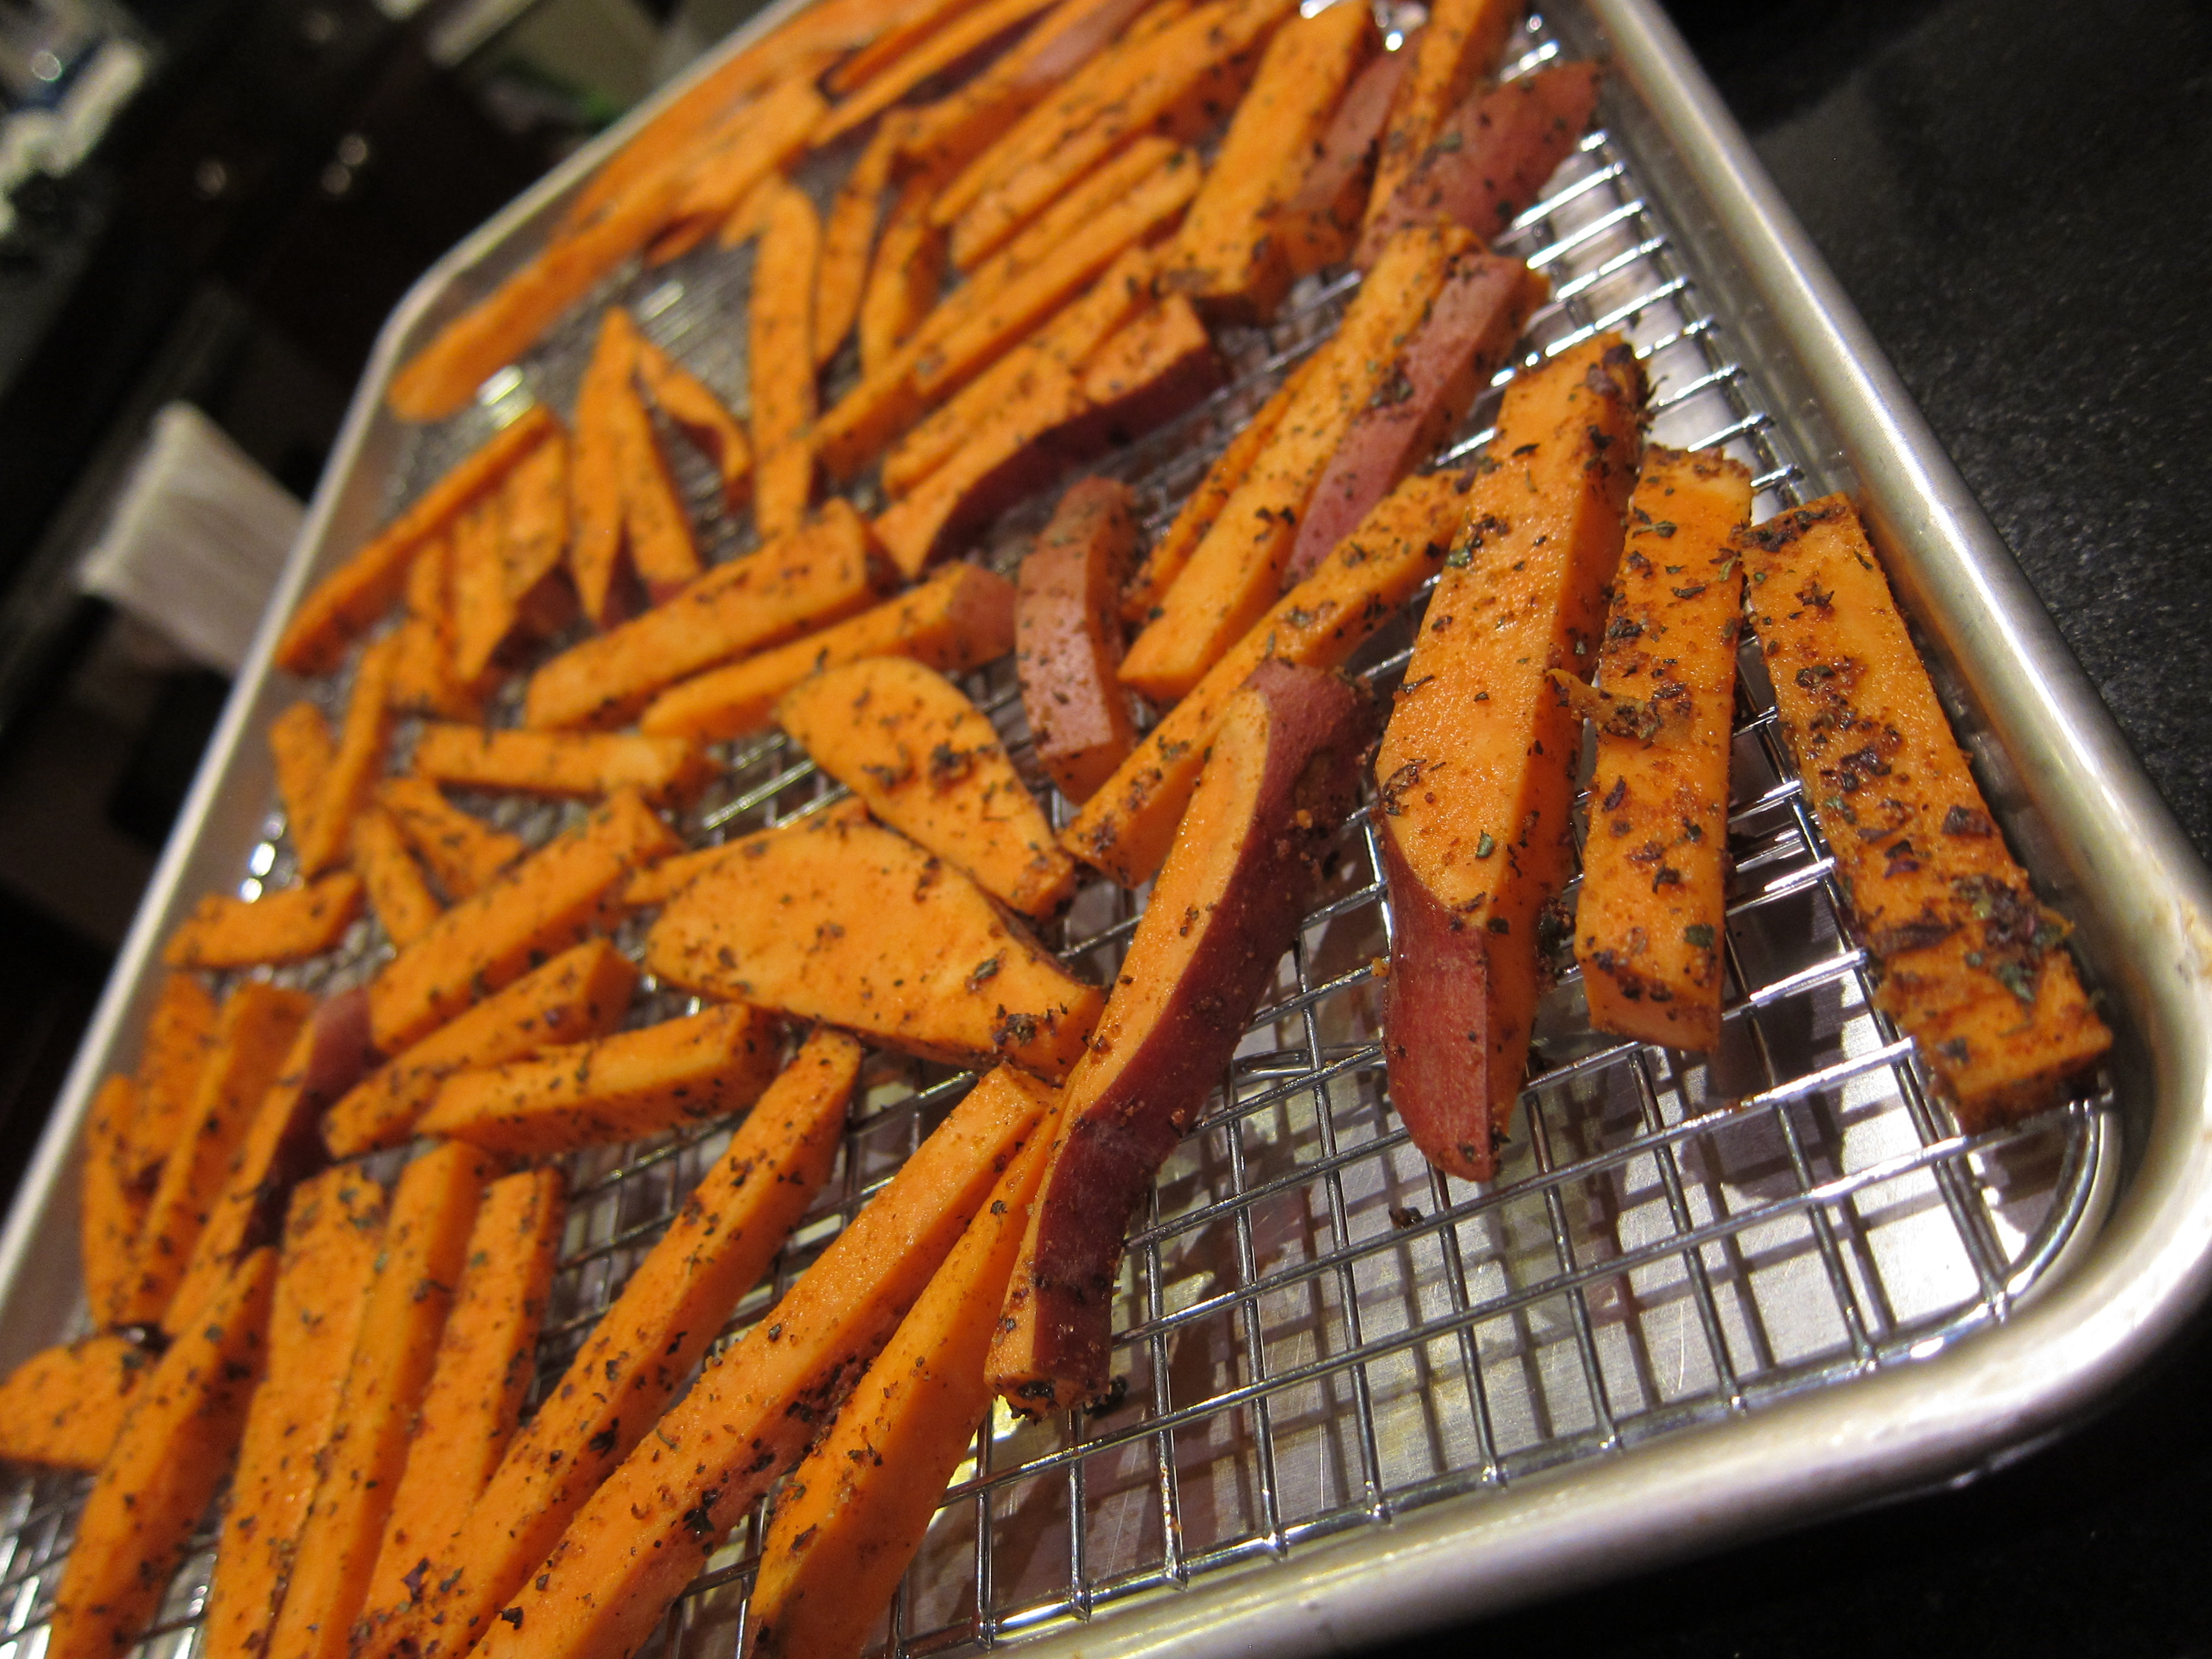
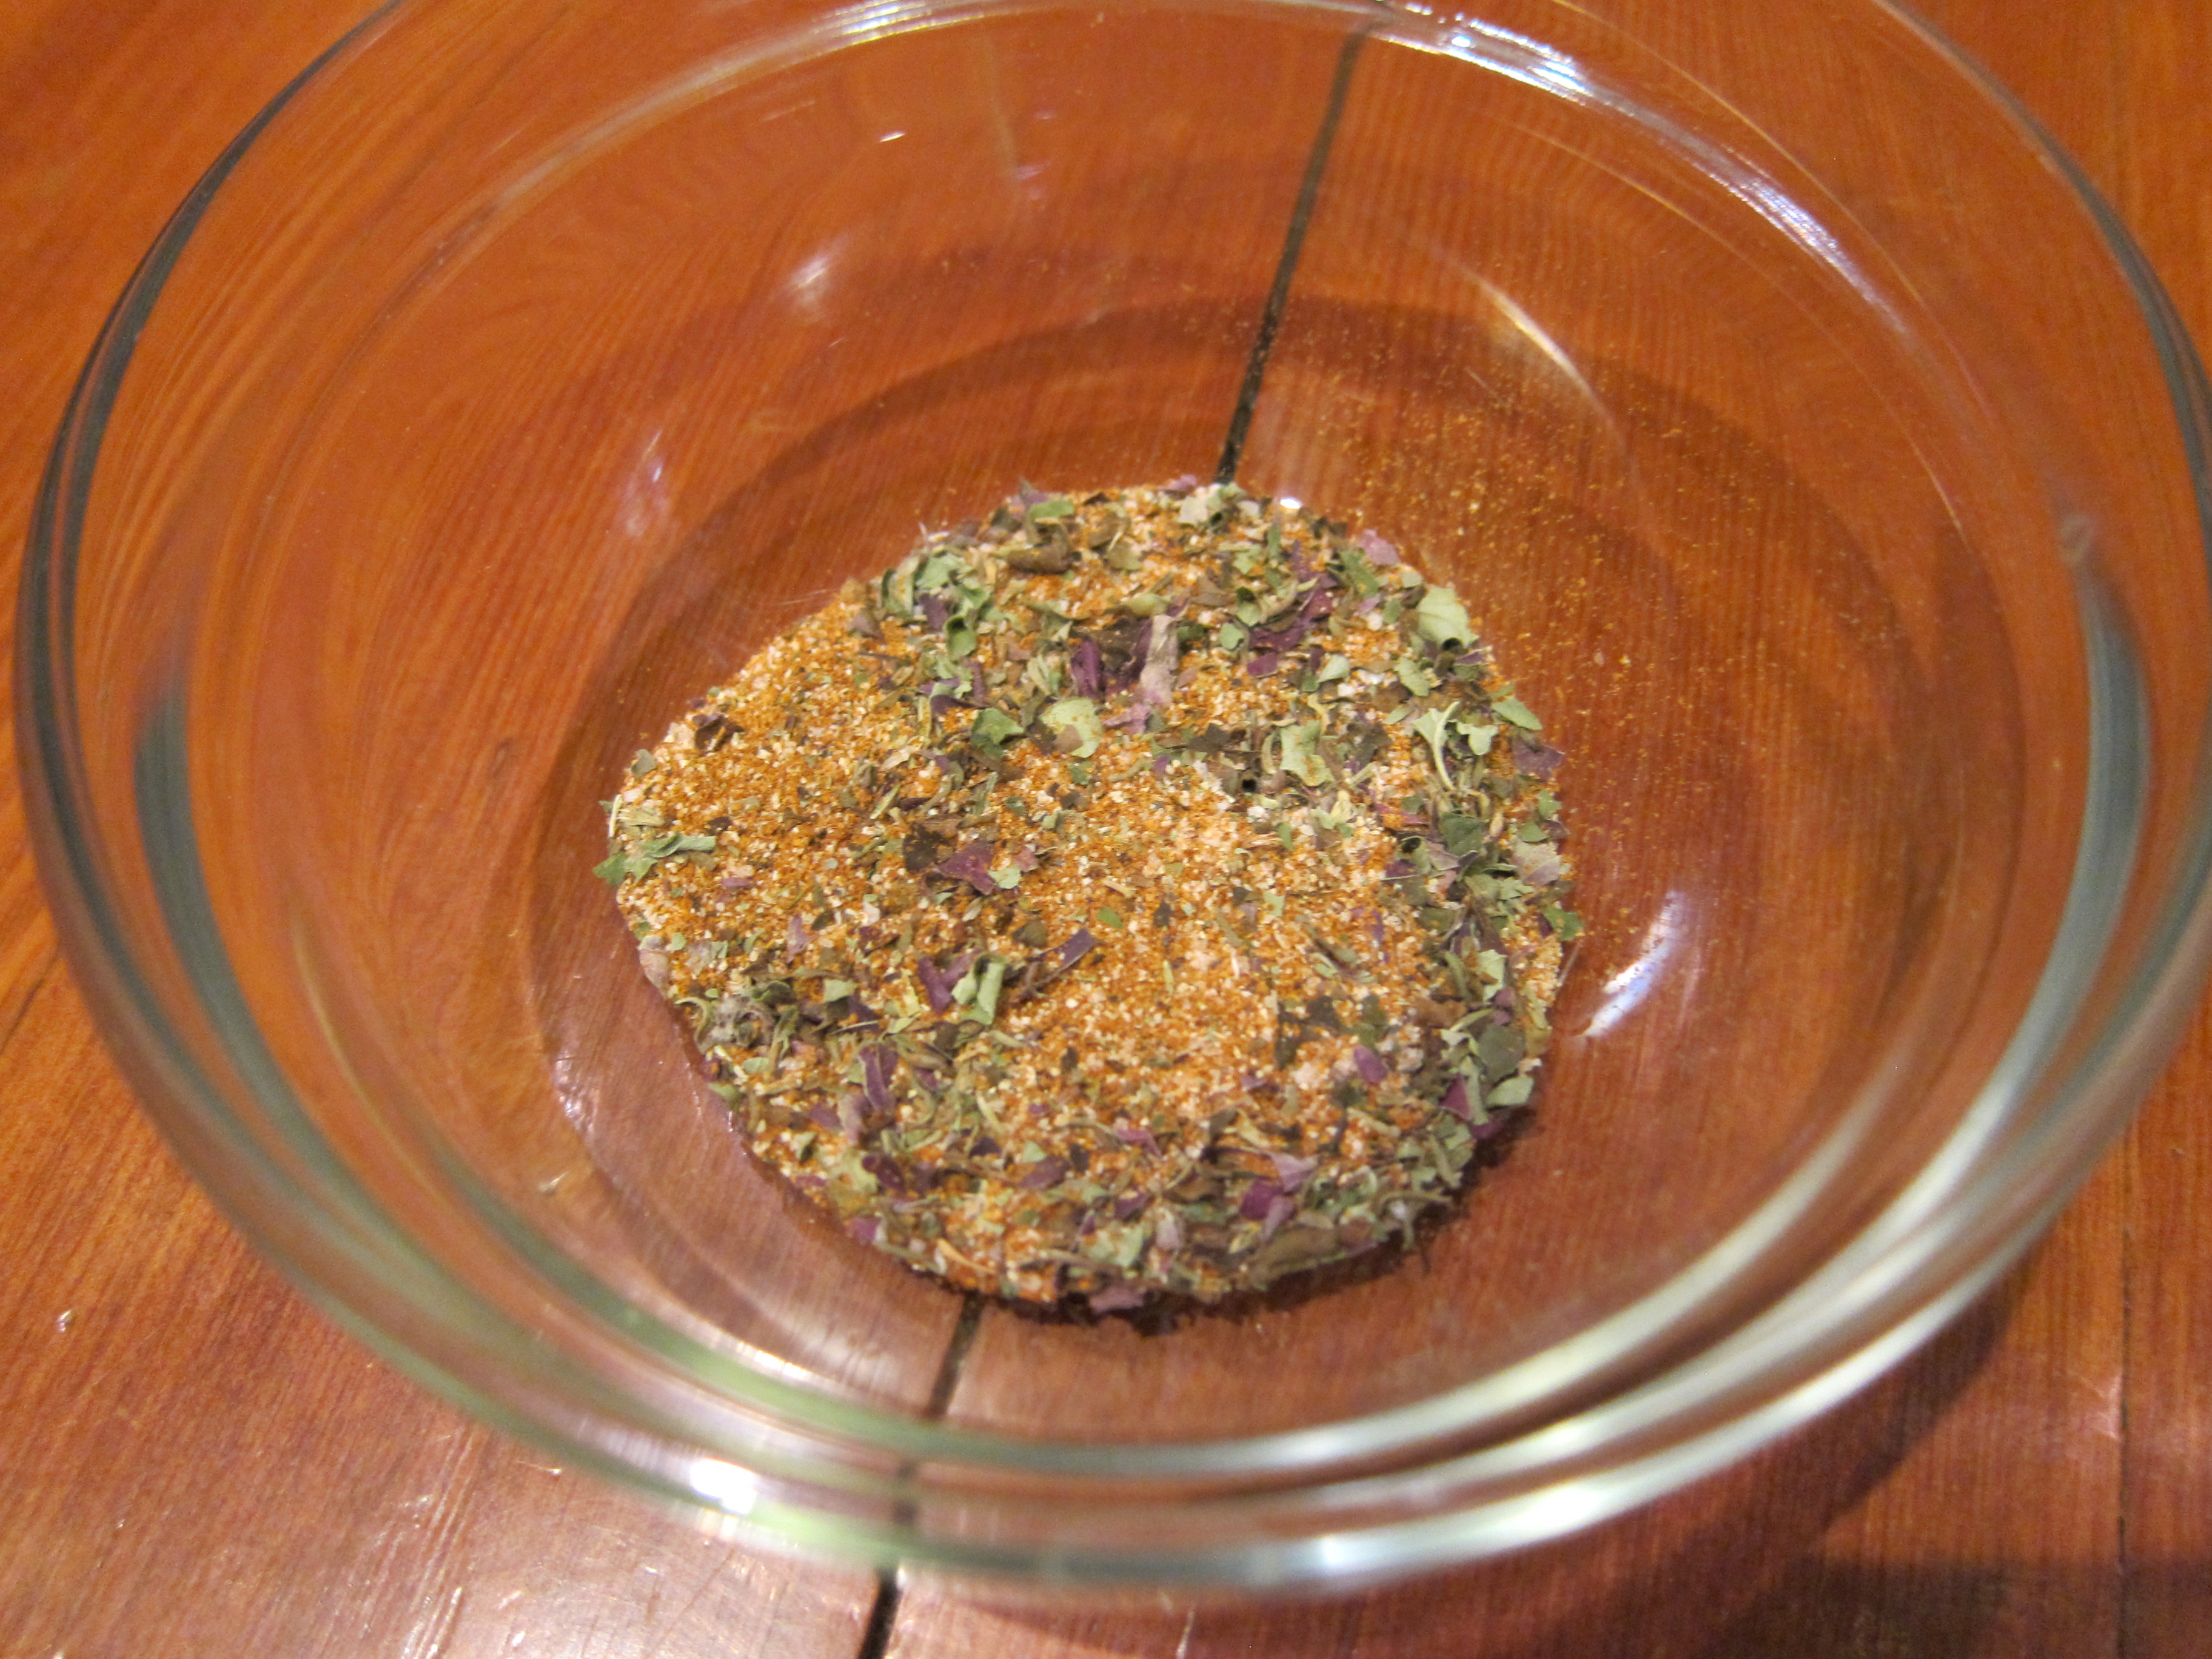
This part was easy, but the sweet potato fries I used to test my ketchup (very hard work, this testing) were even easier. I cut a Jewel and a Garnett variety sweet potato* into standard fry-size pieces, drizzled them with about 3-4 tbsp olive oil, and then tossed them half with salt and pepper and half with this creole spice mix:
- 2 Tbsp celery salt
- 2 Tbsp garlic powder
- 1 Tbsp black pepper
- 1 Tbsp cayenne pepper (or less)
- 1 Tbsp paprika
- 1 Tbsp dried oregano
- 1 Tbsp dried thyme
These fries then went into the oven on a wire rack insert on a baking sheet. If you don’t have such an insert, turn them halfway through. We baked them for 30 minutes at 450 degrees, but be sure to keep an eye out to make sure they don’t burn.
*You’ll find these are usually labeled “yams” rather than “sweet potatoes,” but they are actually sweet potatoes. Harold McGee writes in On Food and Cooking, that sweet potatoes come in “many different varieties, ranging from dry and starchy varieties common in tropical regions, some pale and others reds or purple with anthocyanins, to the moist, sweet version, dark orange with beta carotene, that is popular in the United States and was confusingly named a ‘yam’ in 1930s marketing campaigns.” There is such a thing as a yam, but it’s an entirely different vegetable. McGee notes that true yams are “seldom seen in mainstream American markets, where ‘yam’ means a sugary orange sweet potato.”
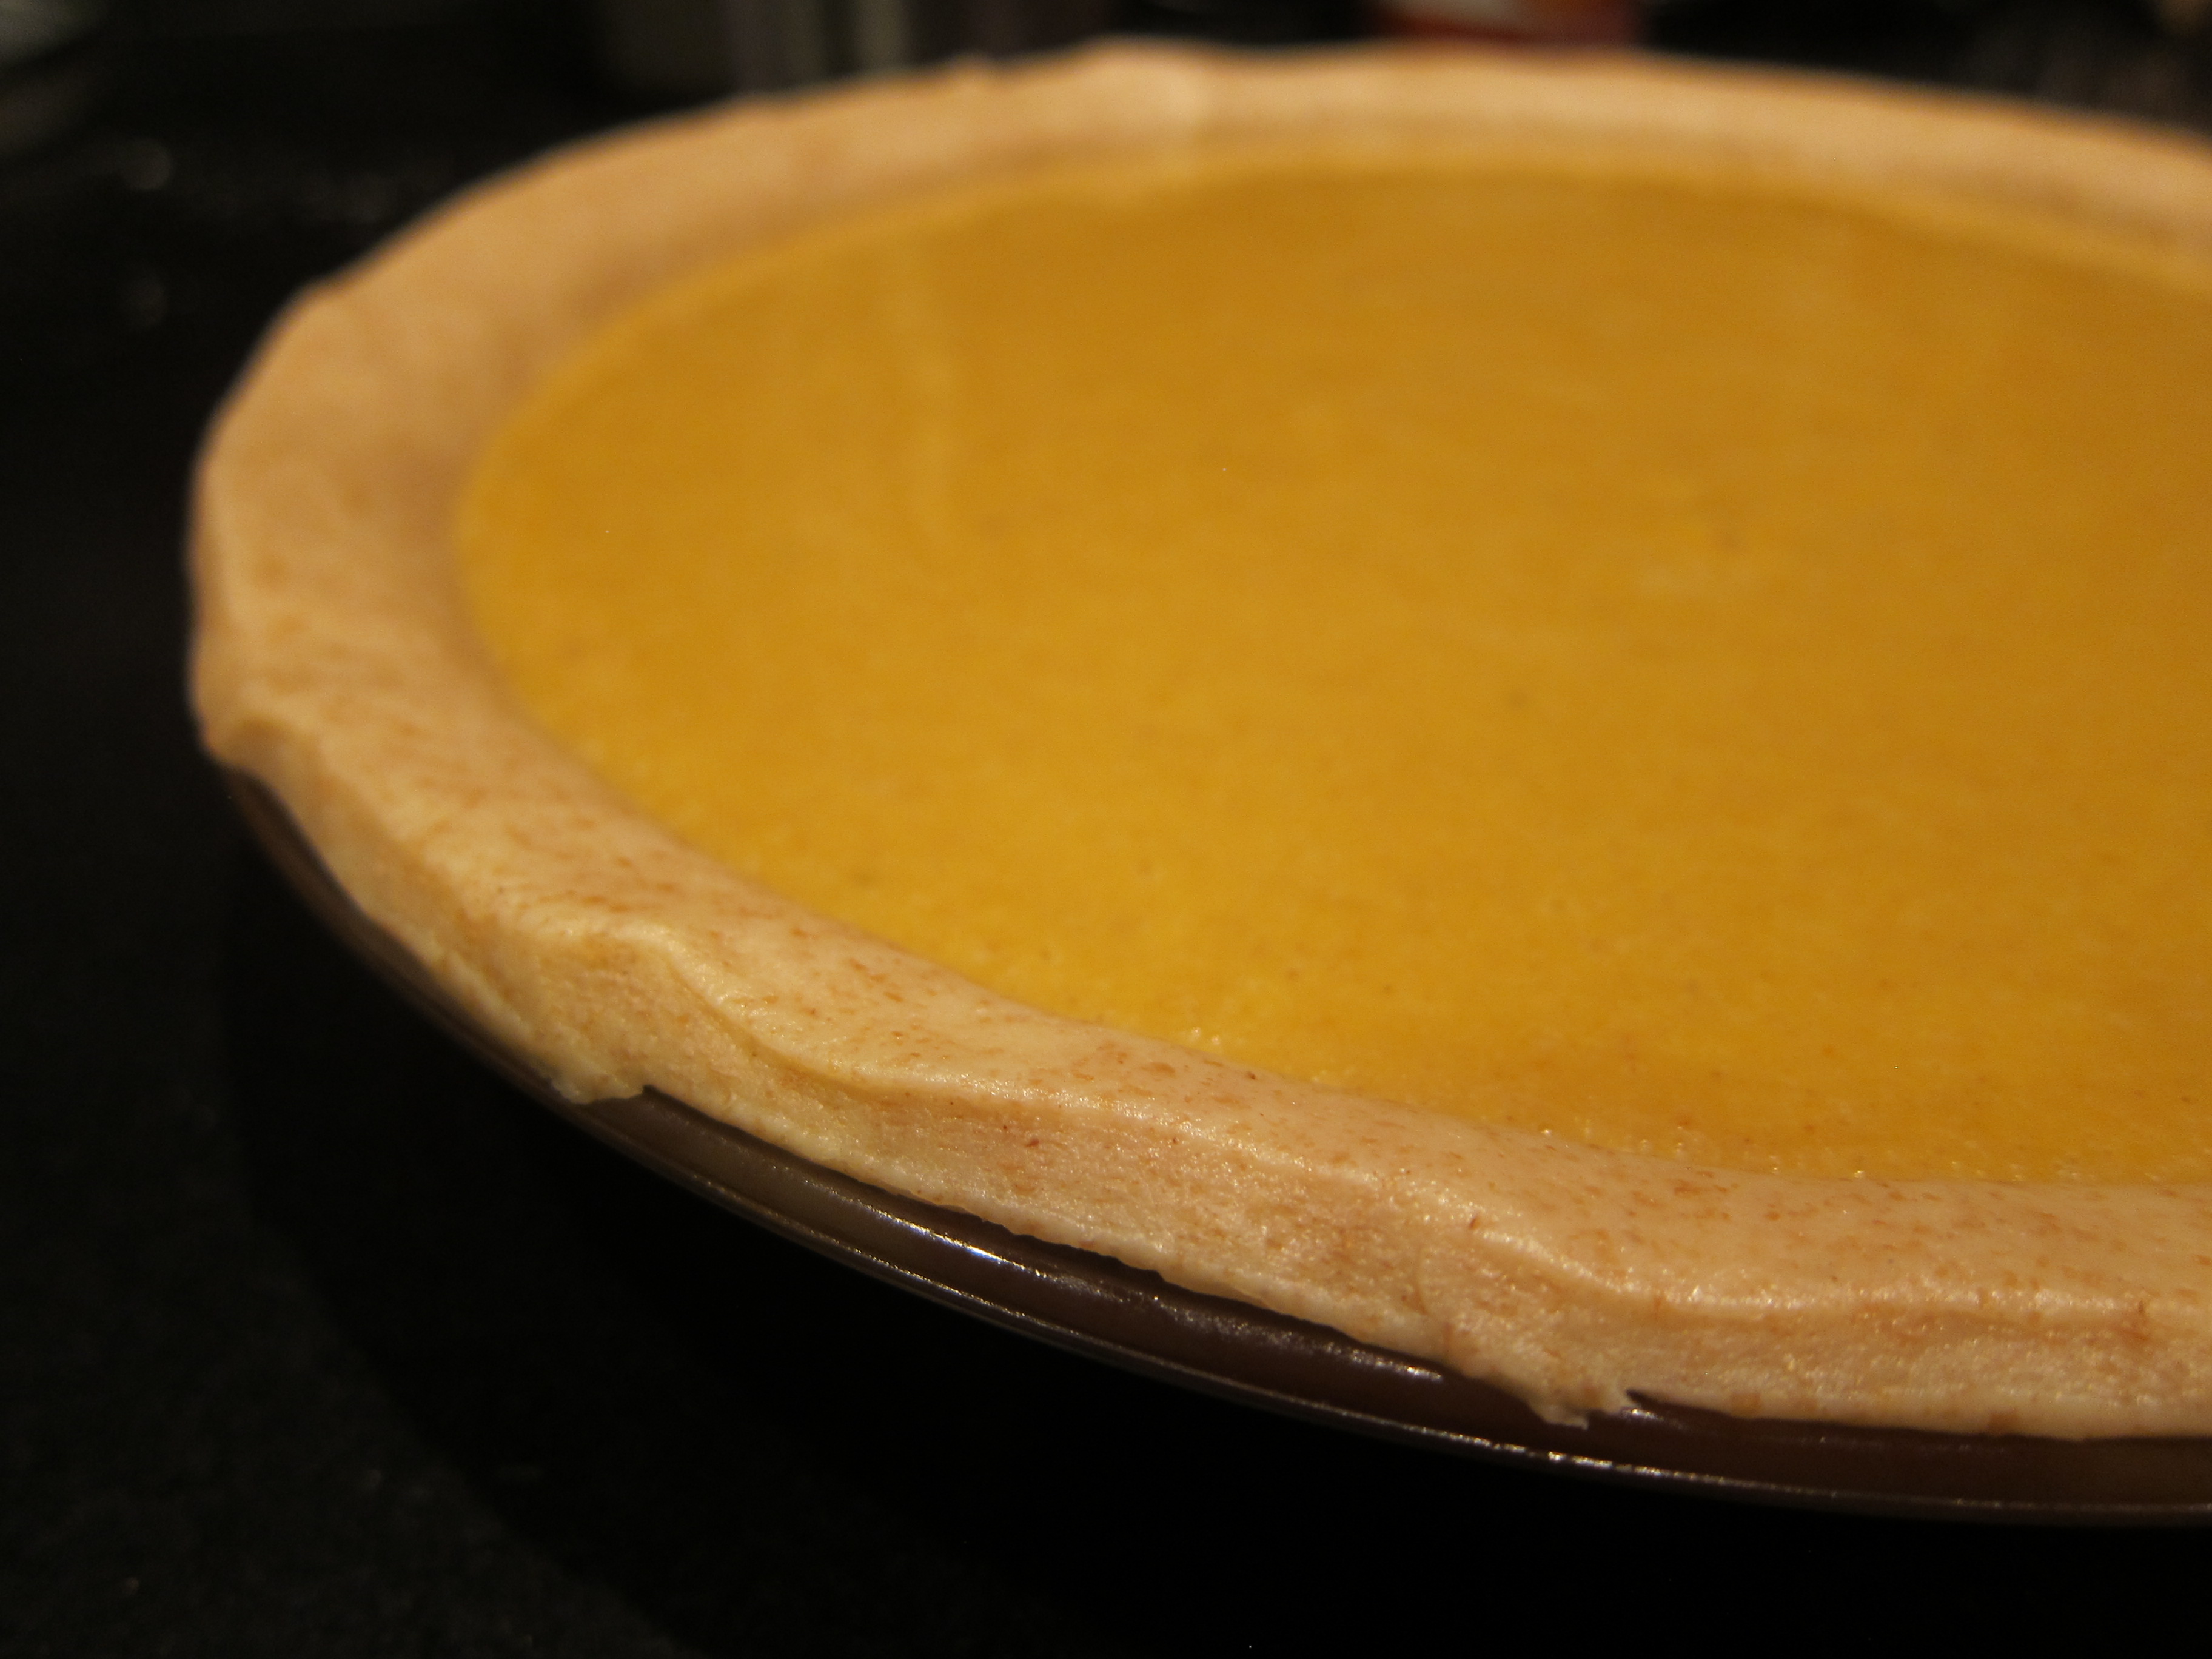
Pumpkin Pie with Spelt Crust

Could you consider pumpkin pie a vegetable side dish? I’ve been arguing this point for some time, and so far the only person I’ve convinced is myself, and even then only when I find myself eating it for lunch. In support of this pumpkin-pie-as-health-food perspective, I’ve developed what I consider to be the most nutritionally virtuous pumpkin pie recipe around. If you have any suggestions on how to do better, I’m all ears, as that will only mean more reasons to eat pumpkin pie as something other than dessert.
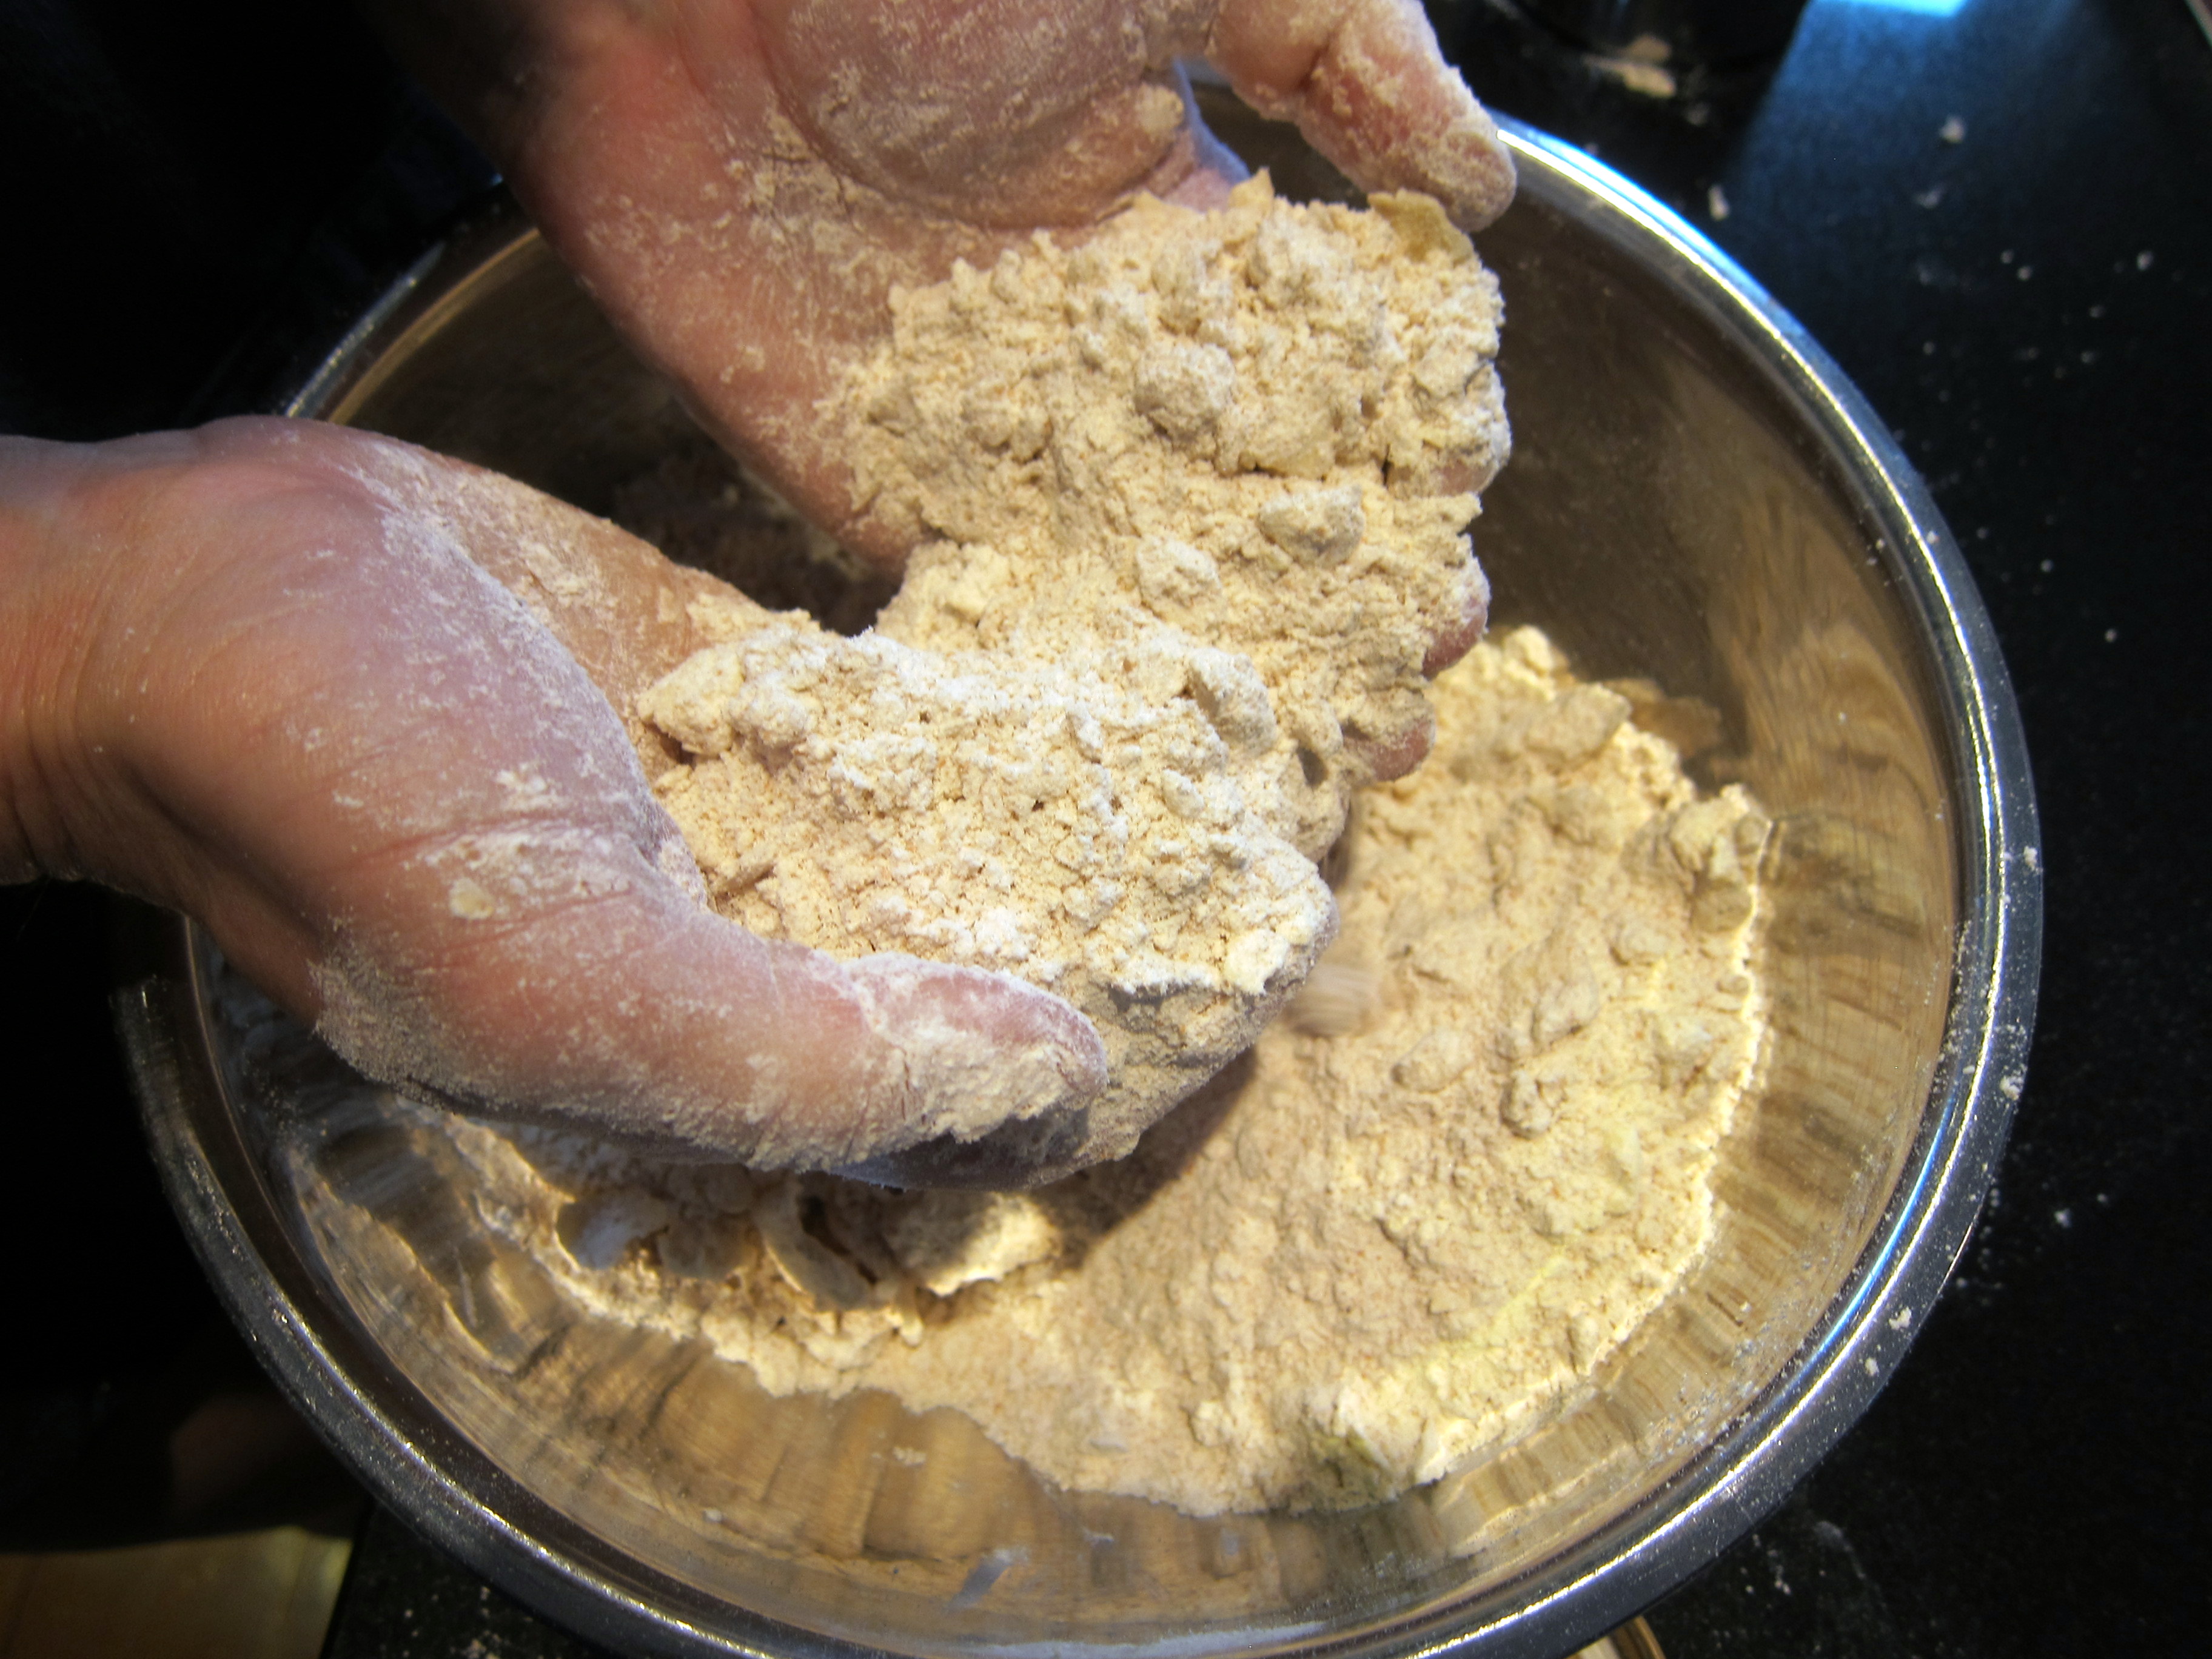
To start with, I make a spelt-based crust slightly modified from a recipe in Good to the Grain: Baking with Whole-Grain Flours. My only change? Subbing coconut oil, which is healthy and flavorful, for vegetable shortening, which is neither. Making this crust is a snap, and it’s much tastier than any pre-made crust you can find. Just be careful you don’t end up eating all the dough raw – a real danger, as it’s delicious. Here’s what it involves:
- 1 1/3 cups spelt flour
- 1 1/3 cup white flour
- 1 tsp salt
- 1 Tbsp light brown sugar
- 1/4 cup coconut oil, at a temperature where it is solid (in my experience, less than 76 degrees F)
- 8 Tbsp butter, cut into hazelnut-sized pieces
- 1/2 cup ice water
The process is quite simple:
- Whisk together the dry ingredients.
- Add the cut-up butter and coconut oil and use your hands to combine, working the butter and coconut oil into small pieces no bigger than a pea. It’s important to do this relatively quickly while the butter is still cool.
- Pour the ice water around the edges and again use your hands to combine, looking to get a pretty shaggy ball of dough.
- Divide the ball of dough in four. Take a quarter and smear it on the counter from one side to the other with the palm of your hand, repeating three or four times until it is a bit smoother and the butter and coconut have mixed into the flour better. This technique is akin to fraisage, but it’s not quite as messy or difficult in this recipe as in others.
- Combine the four quarters of the dough into a single ball, break into two, wrap in plastic or cover with a damp towel, and refrigerate for between one hour and one day.
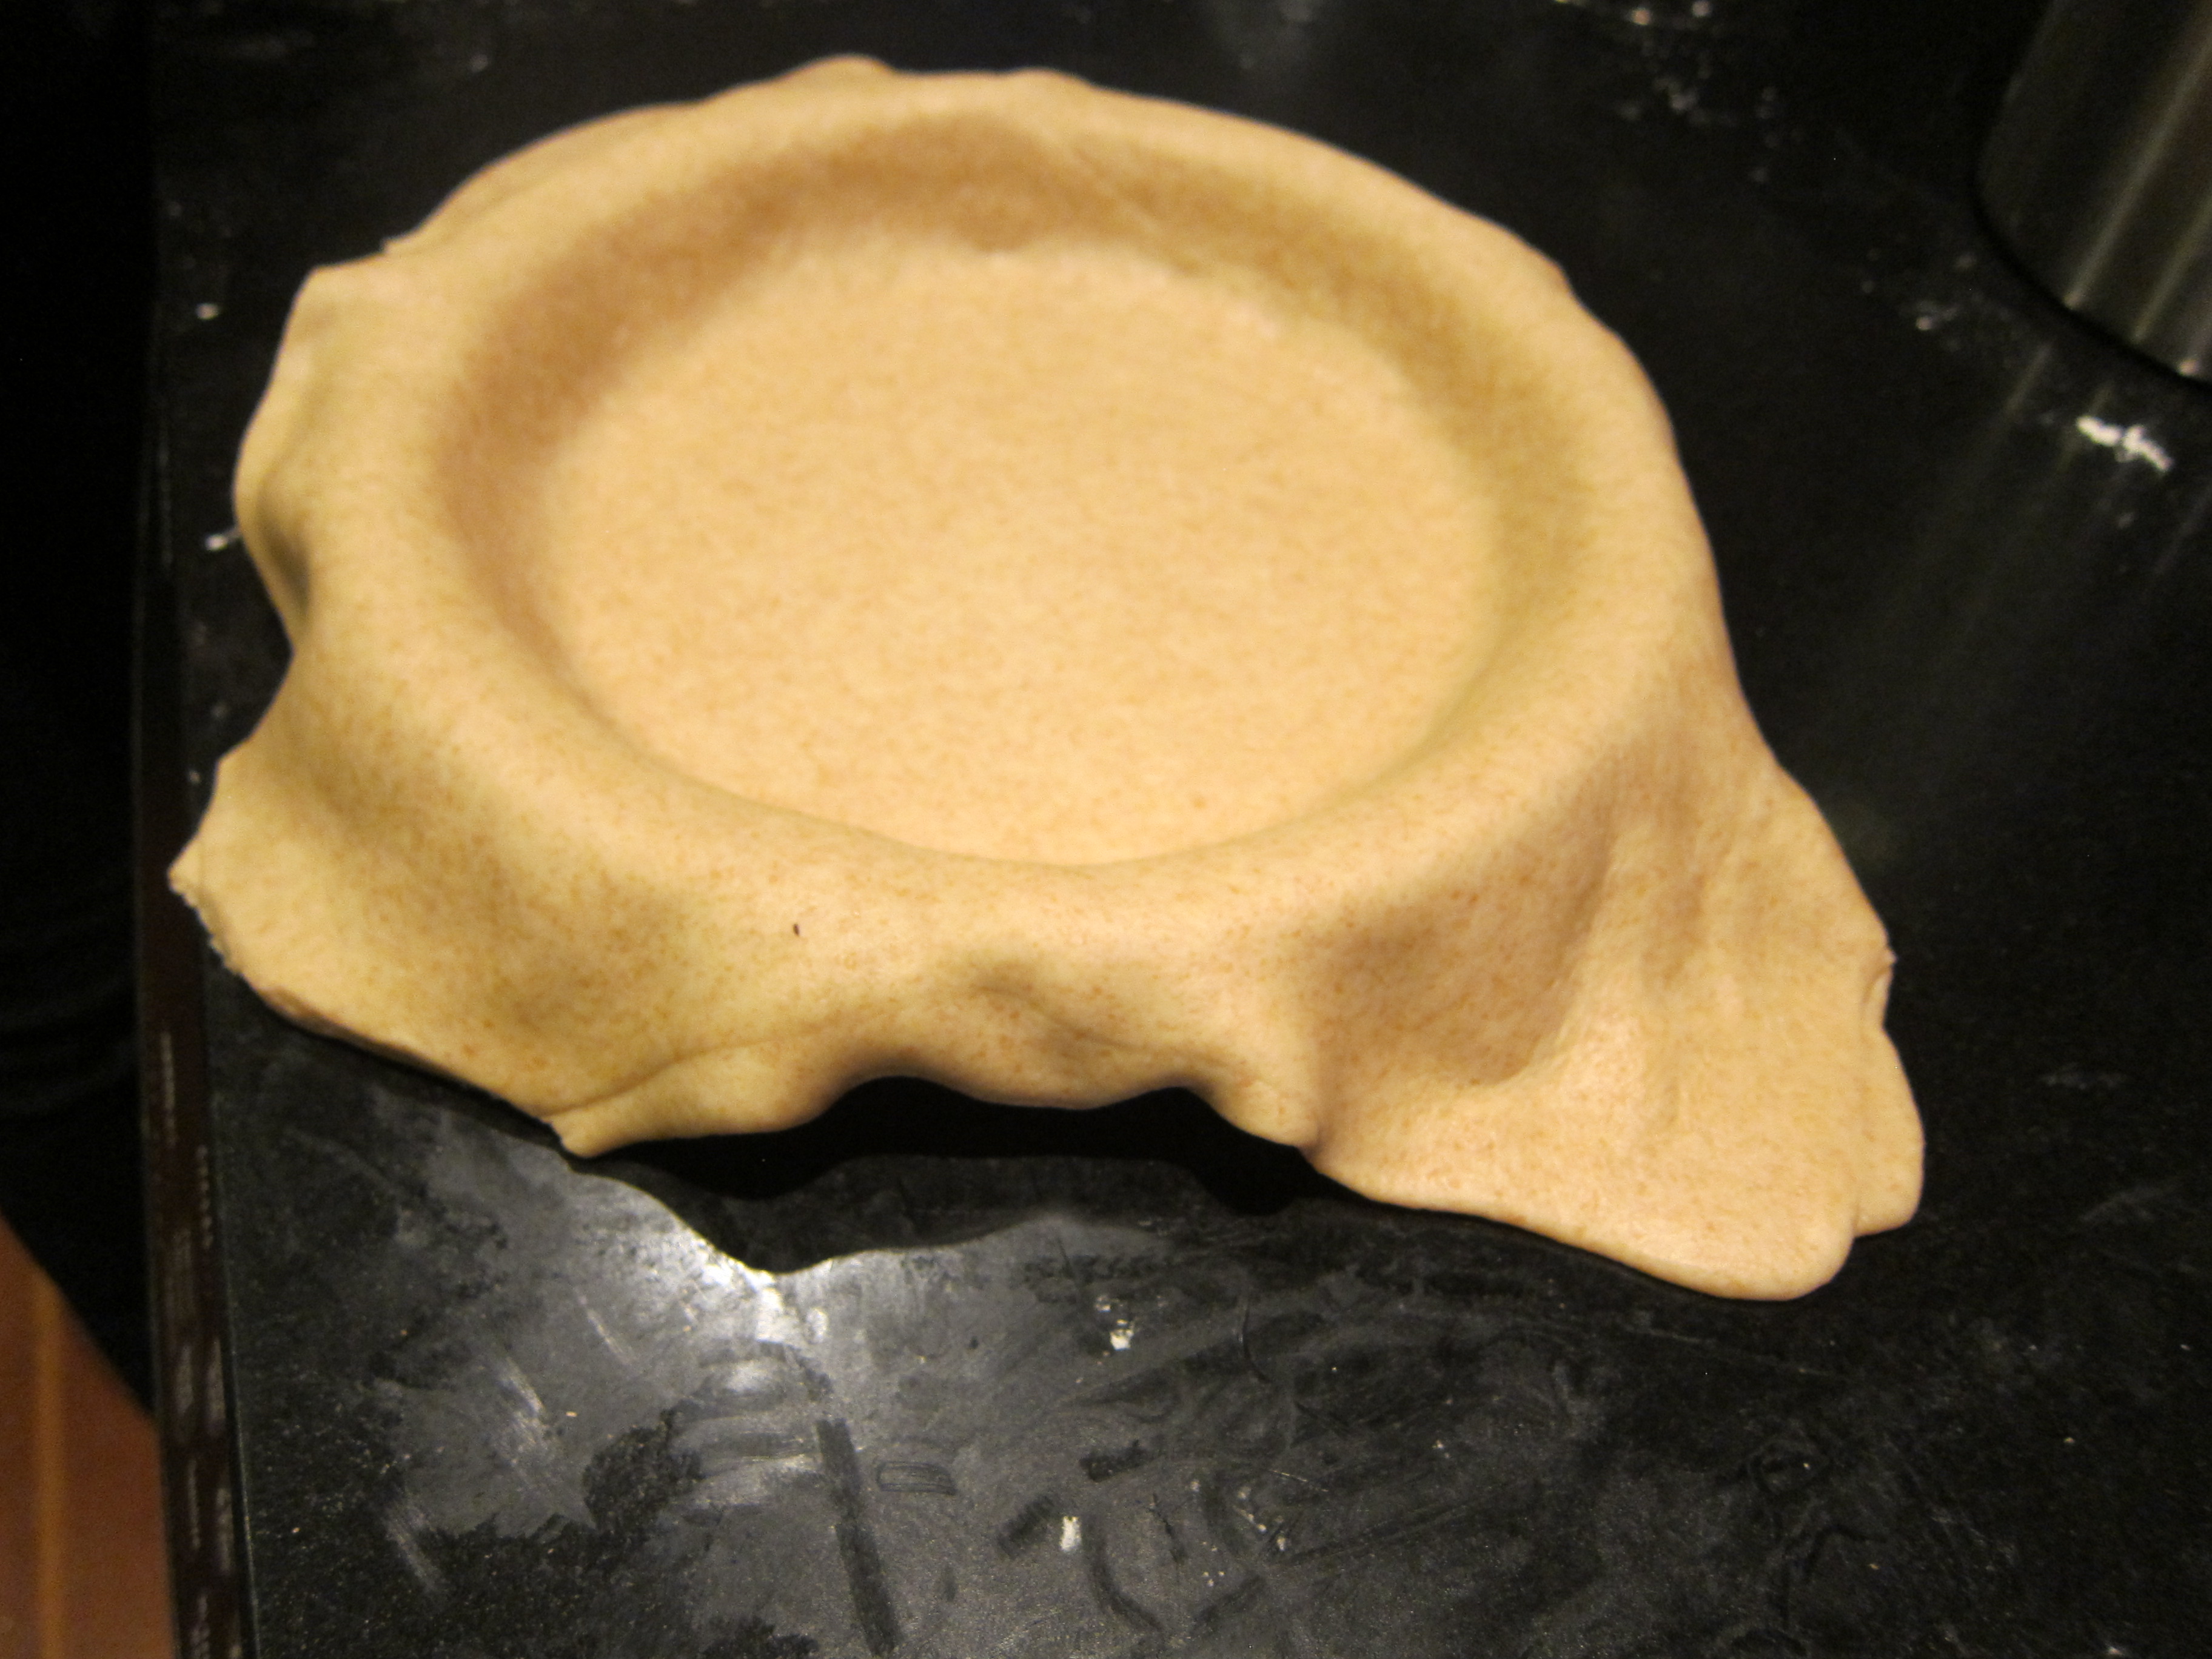
- Roll the dough out to about 1/4 of an inch thick, lay into a greased pie tin, and trim the edges, retaining extra dough for decorations or additional pies.
The next step is the filling. This filling recipe, which is the result of much experimentation, is definitely non-conventional. Instead of using heavy cream and envelopes of “pumpkin pie spice,” I use non-fat dairy, some thickeners, and some great spices you may already have around the house. If you can lay your hands on a fresh pumpkin, definitely cut it up, cook it until it’s tender, scrape out the flesh, and puree it. When that’s not the case, a can of pumpkin puree is an ok substitute. A can is certainly a lot easier, and I won’t judge if you go that route even during pumpkin season.
- 14 oz pumpkin puree*
- 1/2 cup light brown sugar
- 4 pieces crystallized ginger or 1.5 tbsp grated fresh ginger
- 1 tsp ground nutmeg
- 1 tsp ground cinnamon
- 1/2 cup milk
- 1/4 cup milk powder
- 1 tsp corn starch
- 2 eggs
Combine all of these ingredients and pour into the pie filling before baking. The filling will feel very thin, more like a liquid than a pudding. Don’t worry: It will thicken plenty as you bake it. Place the pie into a 350 F oven for 60 minutes, using a pie shield ring if you have one. Use the extra dough to cut out shapes, whether a grid or leaves. Confirm that filling can support the trim; if so, add to the top of the pie and cook for another 10-15 minutes, until all crust is golden. Serve warm or cold.
*Note to Australians: When I lived in your lovely country, I noticed that you refer to all members of the squash family as “pumpkins” (e.g., “butternut pumpkin”). The pumpkin I refer to in this recipe is a special North American breed that is generally round, bright orange, and very starchy. You can substitute some but not all of your “pumpkins” for this if you can’t lay your hands on it; I would recommend an acorn or butternut variety.


Salted Caramels

I have to hold myself back when it comes to salted caramels: I only allow myself to make them once, maybe twice, a year. One time is always around the holidays, because they make killer gifts. I use this Martha Stewart recipe, which I’ve shared below with all the original base ingredients, different toppings, and a different set of instructions.
Here’s what you’ll need:
- 4 cups light corn syrup
- 4 cups raw organic sugar
- 1 tsp salt
- 4 cups heavy cream
- 1 cup sweetened condensed milk
- 1/2 lb (2 sticks) unsalted butter cut up tbsp-sized pieces
- 1 tbsp plus 1 tsp vanilla extract
- Any salt with grains as large as kosher salt
- Grease two glass (preferred) or metal (ok) pans with vegetable oil. Glass casserole pans are ideal.
- Combine the sugar, corn syrup, and salt in a large non-stick pot. Combine cream, condensed milk, and butter in a separate medium pot.
- Cook sugar mixture on medium-high heat, stirring frequently, until sugar is dissolved. Allow to come to to a boil. Turn down heat slightly to keep boil gentle and cook until 250 degrees F (hard ball stage). Try to make this take at least 30 minutes; expect it to take as long as 60 minutes.
- While sugar is reaching 250 degrees, begin to warm cream mixture over low heat, stirring frequently so that heavier condensed milk does not burn at bottom of pan. You are not cooking this; you are just melting the butter and warming the mixture.
- When sugar mixture reaches 250 slowly add the cream mixture, stirring as you go. Mixture may bubble up when you do this; lower heat accordingly.
- Cook the combined cream and sugar mixture, stirring frequently, until it reaches 244 degrees F (firm ball stage). This may take as long as 75 minutes. The mixture will darken over time. When you are ready to stop cooking, drop a bit of caramel into a glass of cold water; the result should be the texture you want your caramels to be.
- Stir in vanilla and pour into prepared pans. After at least 1 hour, sprinkle salt on top. Let stand for a total of at least 12 hours.
- Remove caramel from pans. If desired, sprinkle additional salt on top. Cut into desired shapes. Cut wax paper into squares and wrap caramels not to be served immediately.


Cranberry Apple Salsa

Making cranberry garlands is tedious work! I called it quits after threading just a cup of cranberries, which turned out to be enough for our two-foot tall tree. This left me with about 5 cups of leftover cranberries – a great inspiration for canning. This was most welcome, since cranberries are the very last of the season’s local fruits and I’ve been eyeing my already-dwindling preserve stash with unease.
Though this recipe is for a salsa, you shouldn’t feel you can eat the results only with burritos and tortilla chips. You can consider this a spread as much as a salsa. In fact, I prefer it on a toasted piece of whole-grain bread – this no-knead multi-grain peasant bread from The Kitchn, for example.
I’ve slightly adapted this recipe from one I found in an article on cooking with cranberries on Crosscut.com. Here’s what you’ll need to make four 12oz jars plus a bit to serve fresh:
- 2 medium red onions, diced
- 4 apples, cored and chopped
- 2 jalapeno or serrano peppers
- 1/2 cup sugar
- 1/2 cup honey
- 2 tsp salt
- 3/4 cup apple cider vinegar
- Juice of one lemon
- 3 cups water
- 8 cups fresh whole cranberries
And here’s what to do:
- Add all of the ingredients except for the cranberries to a stockpot
- Bring to a boil and then turn to low heat for 5 minutes
- Add the cranberries and cook over medium heat for 30-40 minutes
- If cranberries have not broken down at this point, use a potato masher to pop them
- If you are canning the results, spoon the salsa into your sterilized jars, wipe the rims, add lids and rings, and place them in a hot water bath for 30 minutes. Remove and wait for lids to pop, storing in fridge for several weeks if they don’t.


Truffled Chard & Quinoa Salad

Cooking with truffle oil feels like cheating. So if you want to argue that this recipe doesn’t really “count” because it uses truffle oil, I won’t disagree. I will, however, keep on making it. And I bet you will, too.
My big problem with salad is the temperature: I like my main dish to be at least warm, if not hot; a cold salad always feels like a side dish to me. Mixing some warm grains in with your fresh greens solves the problem. Quinoa and chard alone are good, but add pine nuts, Parmesan, and truffle oil and there won’t be a single leaf left over.
This is a speedy dish that’ll be ready in about as much time as it takes to cook the quinoa. All you need is:
- One bunch chard
- 1/3-1/2 cup quinoa, depending on your desired grain-to-green ratio
- Two handfuls pine nuts
- 2 tbsp truffle oil
- 1/4 cup freshly grated Parmesan
- Salt and pepper to taste
And here’s what you’ll do:
- Add quinoa to small stockpot and add 2x water. Turn to high heat, bring to boil, then reduce heat to medium. Cook until water has been absorbed and quinoa is soft when you bite it. Drain quinoa and put into a large bowl.
- Wash and stem the chard, reserving stems for later use. Cut chard into bite-size pieces.
- Toast pine nuts in a dry pan over medium heat.
- Put pine nuts into the same large bowl as the quinoa. Toss with chard. Drizzle with truffle oil and toss to mix.
- Add Parmesan and salt and pepper. Toss some more and adjust seasonings as necessary.


Popcorn (Really!)

This post might seem silly. After all, who doesn’t know how to make popcorn? It turns out that I didn’t, and word on the street says that I wasn’t alone.
I blame the hot air popper (and related products like the stir-crazy popper). If you, like me, grew up after its advent, you may have wrongly believed the hot air popper to be a prerequisite for homemade popcorn. And if you, like me, have a small kitchen, owning such a bulky single-purpose appliance may have seemed an impossibility.
Fortunately, a friend of mine taught me just how unnecessary hot air poppers are, and I’m here to do the same for you. Please spread the word! Somehow the hot air popper manufacturers have fooled a generation into thinking specialized equipment is required to make popcorn.
While hot-air poppers are great for making popcorn without oil – something useful for Christmas-tree garlands and…nothing else — with a bit of oil you can easily make popcorn on your stovetop. You can use butter, but we haven’t had much success with it. Instead, we use a mixture of oils. Adjust the ratio to your taste or incorporate other oils, perhaps even truffle. To make it like we do, you’ll need:
- 1/2 cup popcorn kernels (start at 1/2 and adjust down tastier but less healthy results)
- 2 tsp coconut oil
- 2 tsp olive oil
- 2 tsp canola oil
- Salt to taste
And here’s what you’ll do:
- Add the oils to a large pot (preferably heavy and non-stick) and turn heat to high.
- Place a lid on the pot to shield yourself from hot oil, leaving it a bit askew so that some hot air can escape.
- Place three popcorn kernels in and wait until they pop.
- As soon as the third kernel pops, put the rest of the kernels in.
- Wait for the fourth kernel to pop. Then wait another 45 seconds, and turn the heat down to medium.
- Once popping has slowed so that there are three seconds between pops, remove popcorn from heat.
- Wait for popping to completely stop, then tip into bowl, salt, and serve.
P.S. Did you know popcorn is a whole grain? Happy snacking!


Kale Almond Pesto

Lemons, avocados, and redwoods. My relatives may be able to grow these things in their backyards in California, but I’ll never be able to get them going here in Cambridge. Kale, however, is quite happy here, even through October and November. My five kale plants have kept us in greens all summer, and with fall kicking into gear I figured it was time for a final harvest. My preferred vehicle for kale storage is kale almond pesto.
I stumbled on this kale pesto recipe in an unlikely place: A blog called “Always Order Dessert.” (Maybe if you eat a lot of kale you can afford to get dessert.) There are three things I like about it, especially compared to a traditional basil pesto recipe:
- Kale. Basil’s not bad for you, for sure, but kale is pretty hard to beat when it comes to nutrition. And, as I mentioned, it has a long growing season here in the northeast.
- Almonds. Pine nuts are delicious, but they are expensive. Almonds are much more wallet-friendly. And almonds are also lower fat, and their fat content is a healthier mix of saturated and unsaturated. Plus, almonds never cause pine mouth.
- A muffin tray. I would never have thought to freeze pesto in a muffin tray and then move it to plastic bags. Genius! This produces convenient pucks you can use one by one – much better than a monolithic block of pesto ice.
The recipe works well when executed strictly, but I find there is a lot of room for interpretation in pesto. You can adjust any of the ingredients in this recipe and still end up with a damned good pesto. Just be careful that you don’t go overboard with the garlic.
So, without further ado, here is what you’ll need for a full muffin tray of pesto pucks. I made this in three batches, and you can easily make just a third of it with a single bunch of store-bought kale and a third the other ingredients.
- 9 cloves garlic
- 1 1/2 cups raw unsalted almonds
- 1 1/2 lb kale
- 1 1/2 cups olive oil
- Juice of 1 lemon
- 6 tsp salt
- Fresh ground pepper to taste
- 1 muffin tray
And here’s what you’ll do:
- Wash the kale and remove the stems if you feel like it (sometimes I do, sometimes I don’t)
- Pulverize the garlic and almonds in your food processor
- Add the kale, olive oil, and lemon juice bit by bit
- Finish by incorporating salt and pepper to taste
- Spoon into muffin tray and place in freezer
- When frozen, use a butter knife to pry pucks out and then move to plastic bag
We like to use the frozen pucks as a topping for pizza and pasta, but there are lots of other possible applications. Many people recommend freezing pesto without the cheese and adding it later on, but I’ve never had a problem with frozen pesto that has cheese built into it.


Flour Tortillas

I wasn’t sure how tough it would be to make tortillas. Not only am I a gringo, but I’ve spent nearly all of my life in Boston, which must qualify me for some extra special level of gringo status. I figured I lacked the know-how to pull off any sort of Mexican food, so I looked extra hard for a good recipe. I found one on a blog that oozes Tex-Mex credibility: The Homesick Texan.
The freshness of homemade tortillas was something I was not prepared for. They taste like bread, rather than like rubber or playdough – imagine that! And they were easy to make, too. We’re definitely going to be making more Mexican from now on. The tortillas took 45 minutes, from start to finish, and 30 of those 45 were for dough rising and resting.
Here’s all you’ll need to make flour tortillas with the Homesick Texan’s recipe, with just a few tweaks. Note that there is no lard or shortening required.
- 2 cups flour
- 1 1/2 tsp baking powder
- 1 tsp salt
- 2 tsp vegetable oil
- 3/4 cup warm milk
And here’s what you’ll do:
- Combine dry ingredients and whisk together.
- Add wet ingredients and stir to combine.
- Knead dough for two minutes until relatively smooth and elastic.
- Cover with damp towel and let rest for 20 minutes.
- Break into either 6 or 8 balls (8 balls gave me 6″ tortillas; I think 6 balls would have given me 8″ tortillas.)
- Cover balls with damp towel and let rest for 10 minutes.
- Heat up a dry cast iron skillet or similar. Don’t put any butter or oil in the pan.
- Lightly dust your counter with flour and roll dough balls out as thin as you can, to 6″ or 8″ depending on how many you have. Here’s a trick: Roll them as thin as you can and then lift the edges, stretch, and place down a bit further out. Repeat all the way around the tortilla.
- Cook each rolled-out tortilla in the dry skillet for 30 seconds on each side.
That evening we served our tortillas slathered with sour cream and filled with cilantro rice, home-cooked black beans, and homemade salsa. The ones that we’d rolled out the furthest were the best; the others were a bit thicker than we were used to but still delicious.
And the next morning, we used the tortillas to make breakfast burritos: 3 eggs, 1/3 cup cooked black beans, 4 cherry tomatoes, 1 tomatillo, 1 tiny pepper, 1 tiny Jalapeno, 1/2 an onion, 2 tbsp fresh cilantro, a little sour cream, a little grated cheddar, and a little homemade salsa. Delicious!


